01
Dashboard
A quick view of the branch's daily performance.
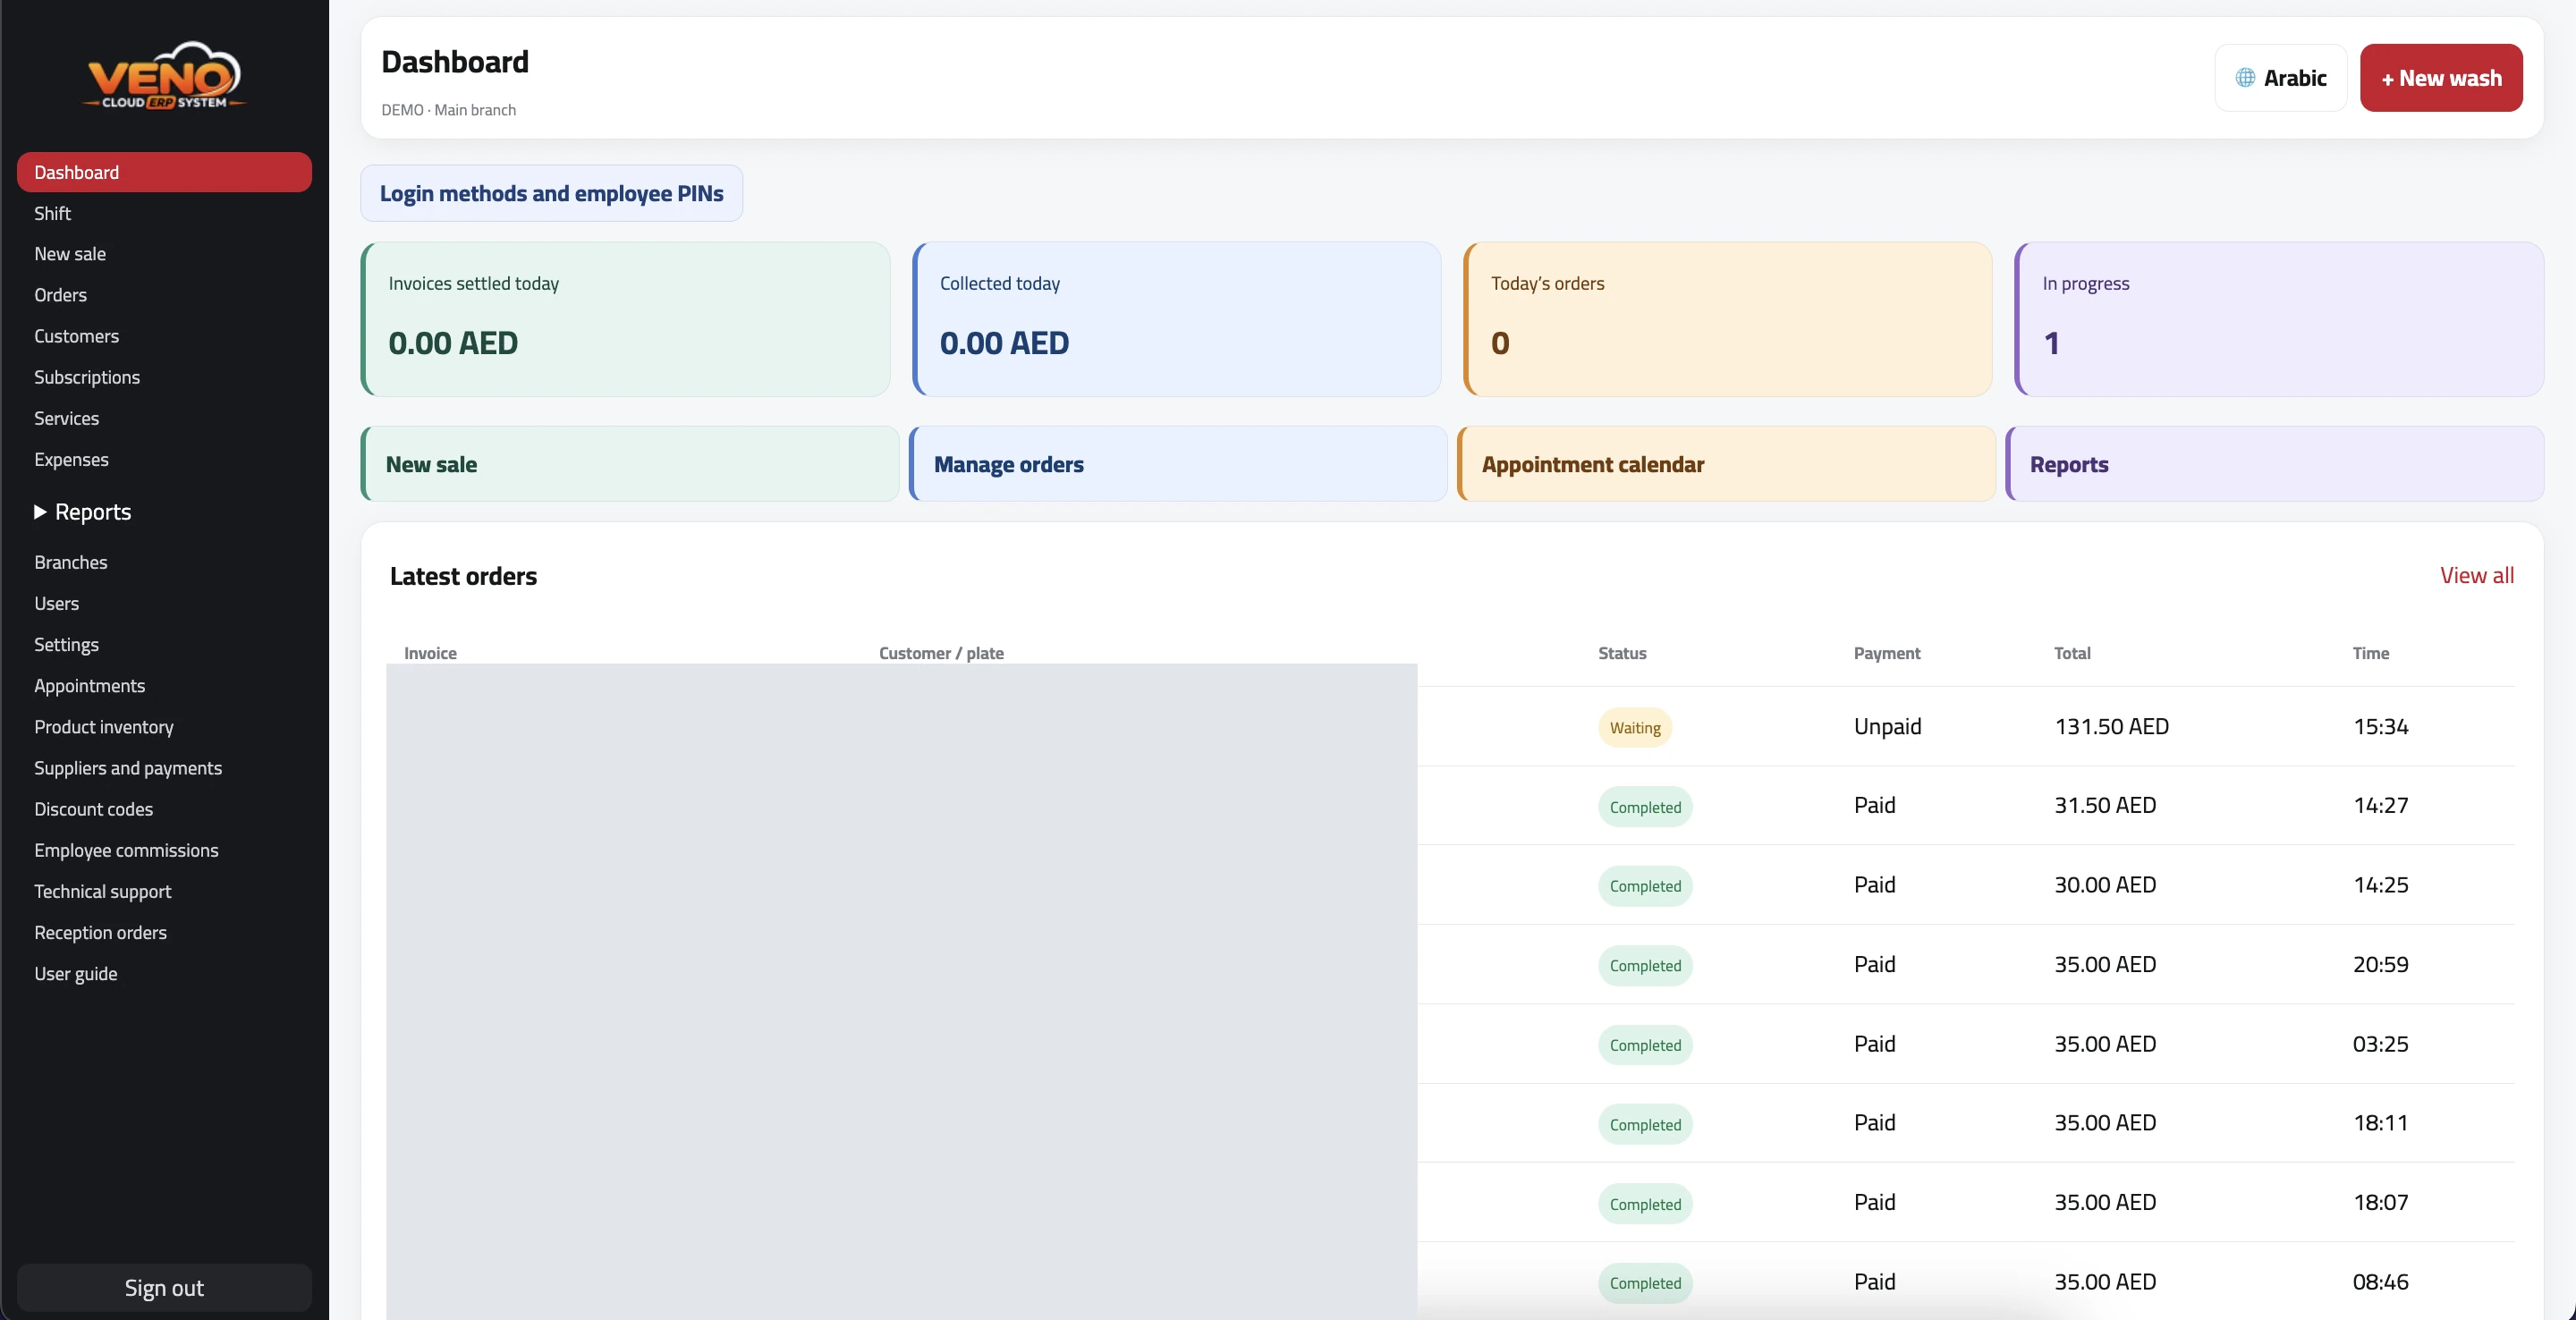 Dashboard · Select the image to enlarge
- Review today's sales, collections, order count, and orders in progress.
- Use Recent Orders to open an invoice and follow its status.
- Owners and managers can switch branches when permitted.
Tip: Today's indicators update automatically as orders and payments are recorded.
02
Open and close shifts
A shift must be open before using the sales screen.
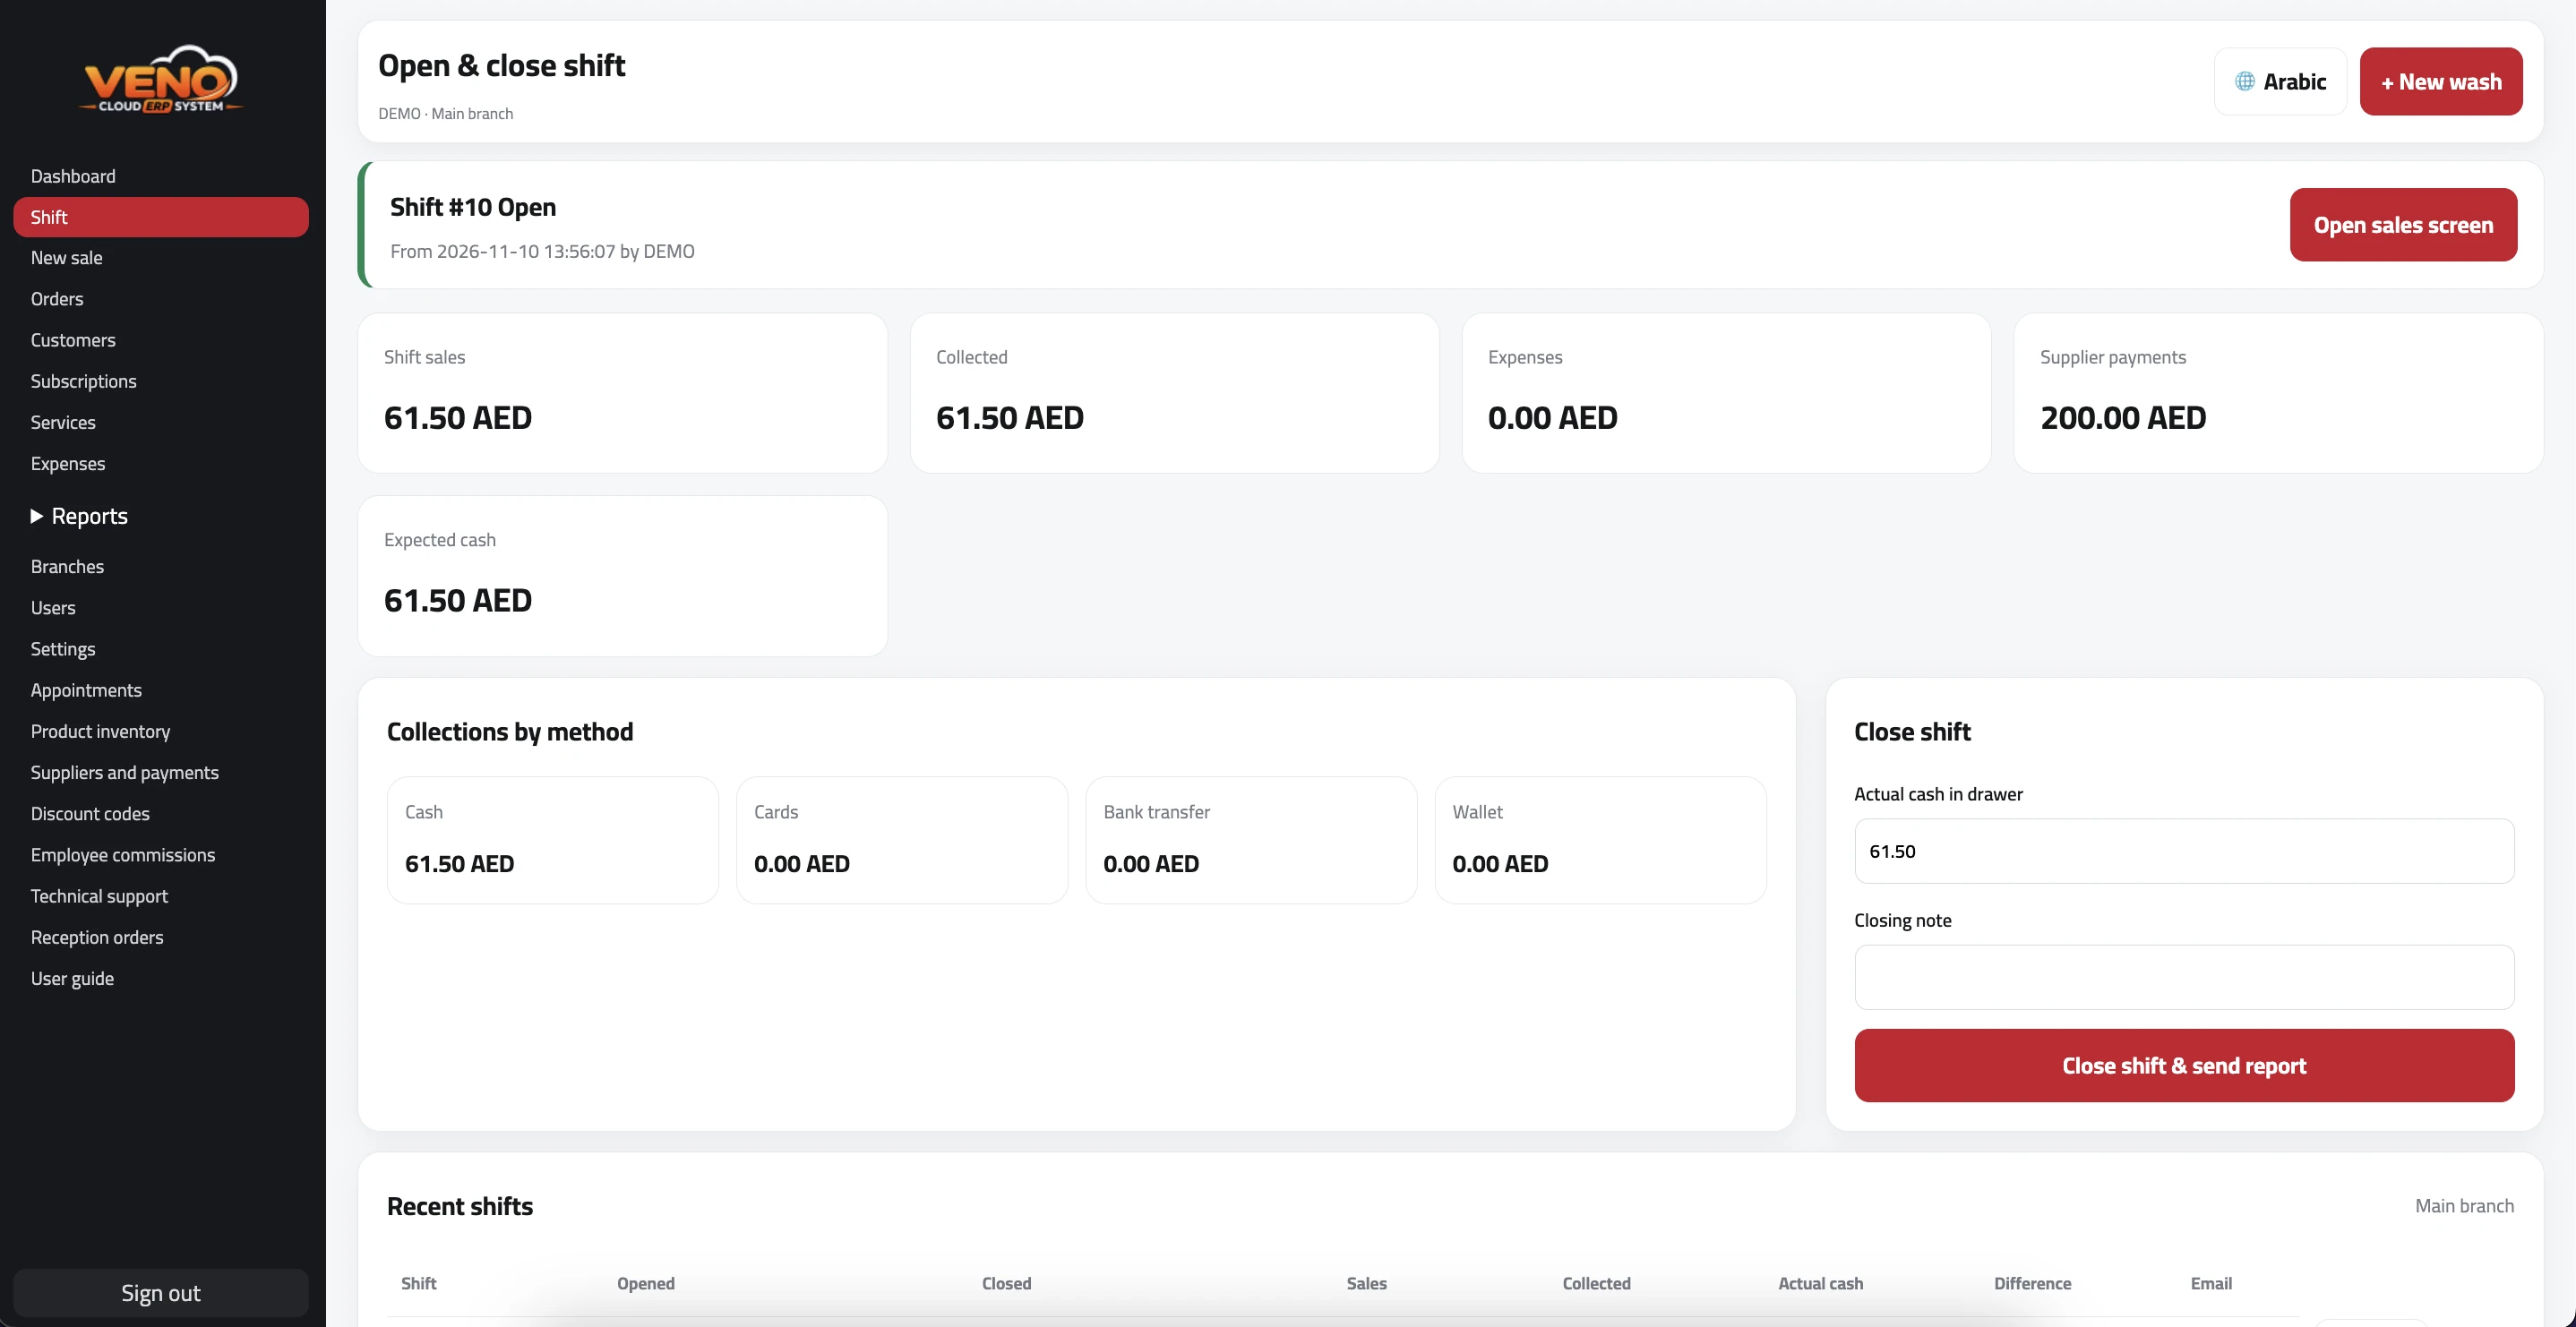 Open and close shifts · Select the image to enlarge
- Enter the drawer opening cash, then select Open Shift.
- Track sales, collections, expenses, and expected cash by payment method.
- Enter actual cash, explain any difference, then close the shift.
- The closing summary is emailed to the owner's saved address.
Tip: The sales screen remains locked until the branch has an active shift.
Print preview
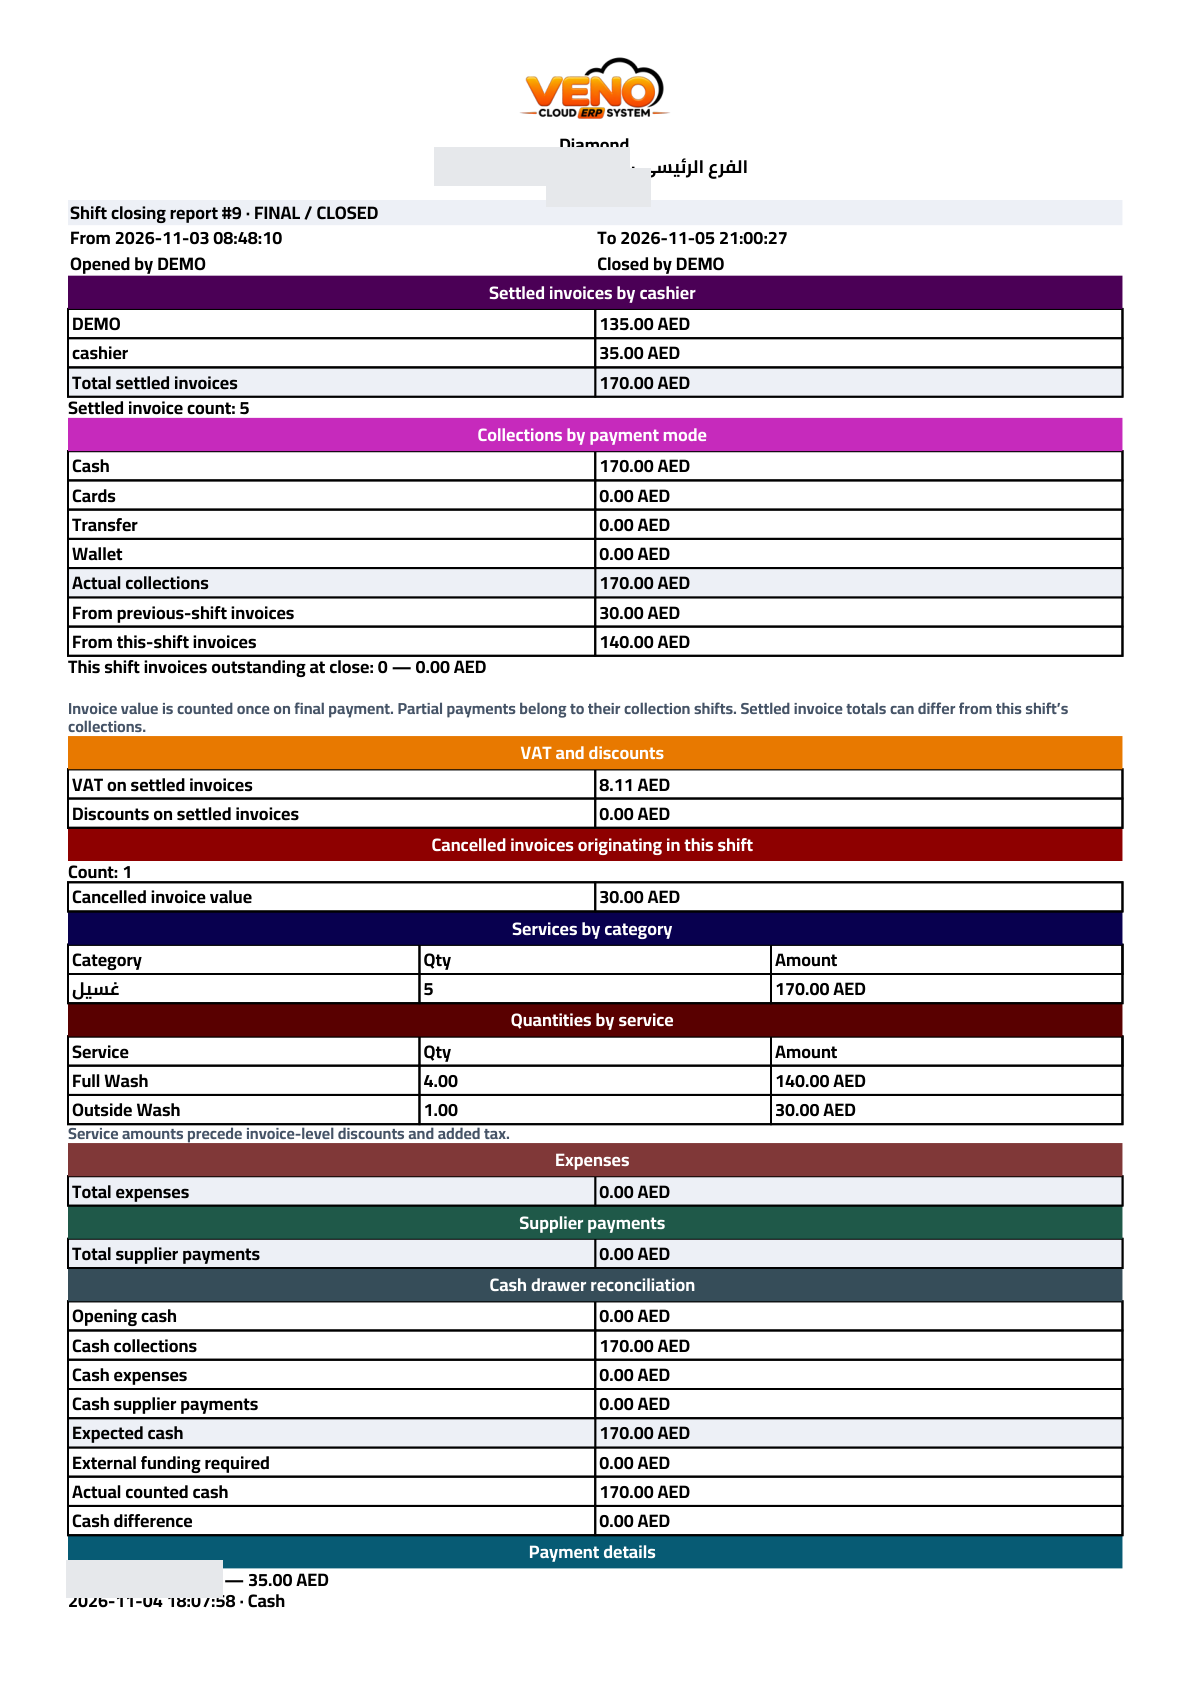 Shift closing report — Summary and cash reconciliation · Select to enlarge
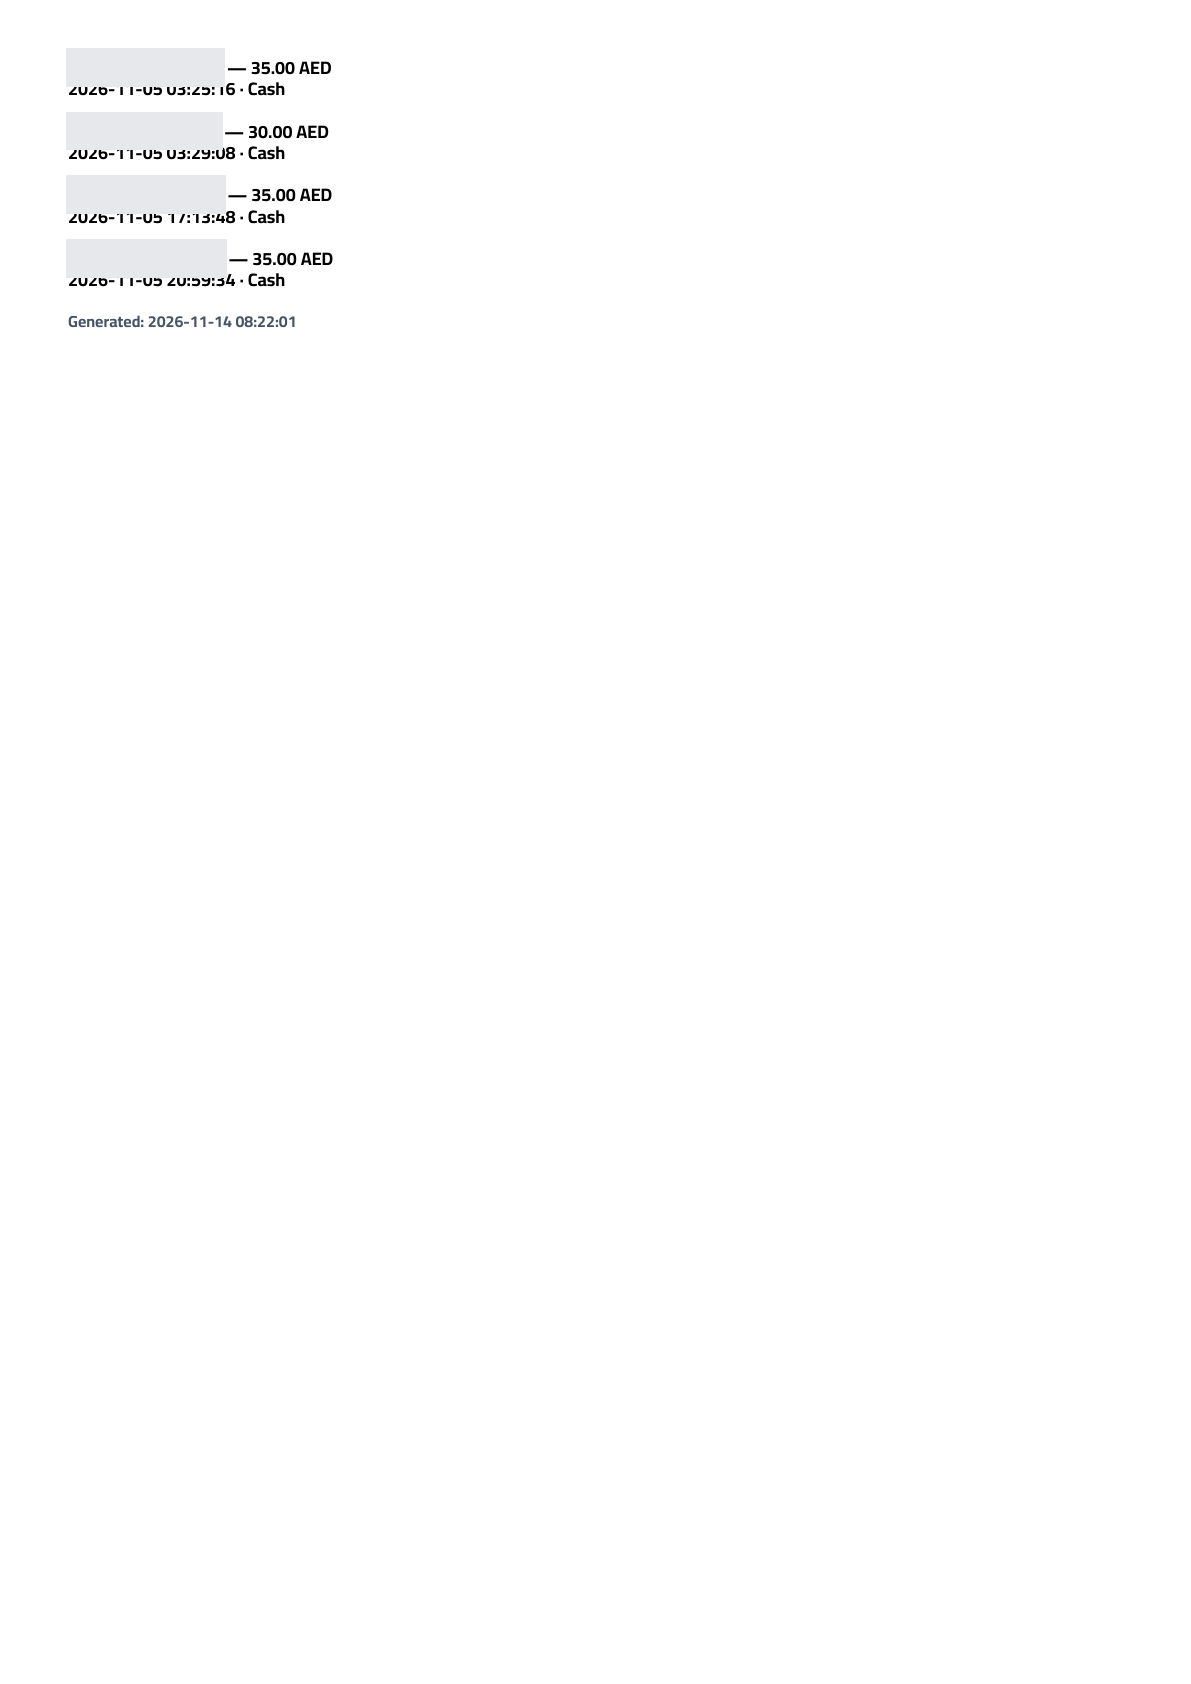 Shift closing report — Payment details continued · Select to enlarge
03
Create a wash order
A fast sales screen designed to reduce cashier steps.
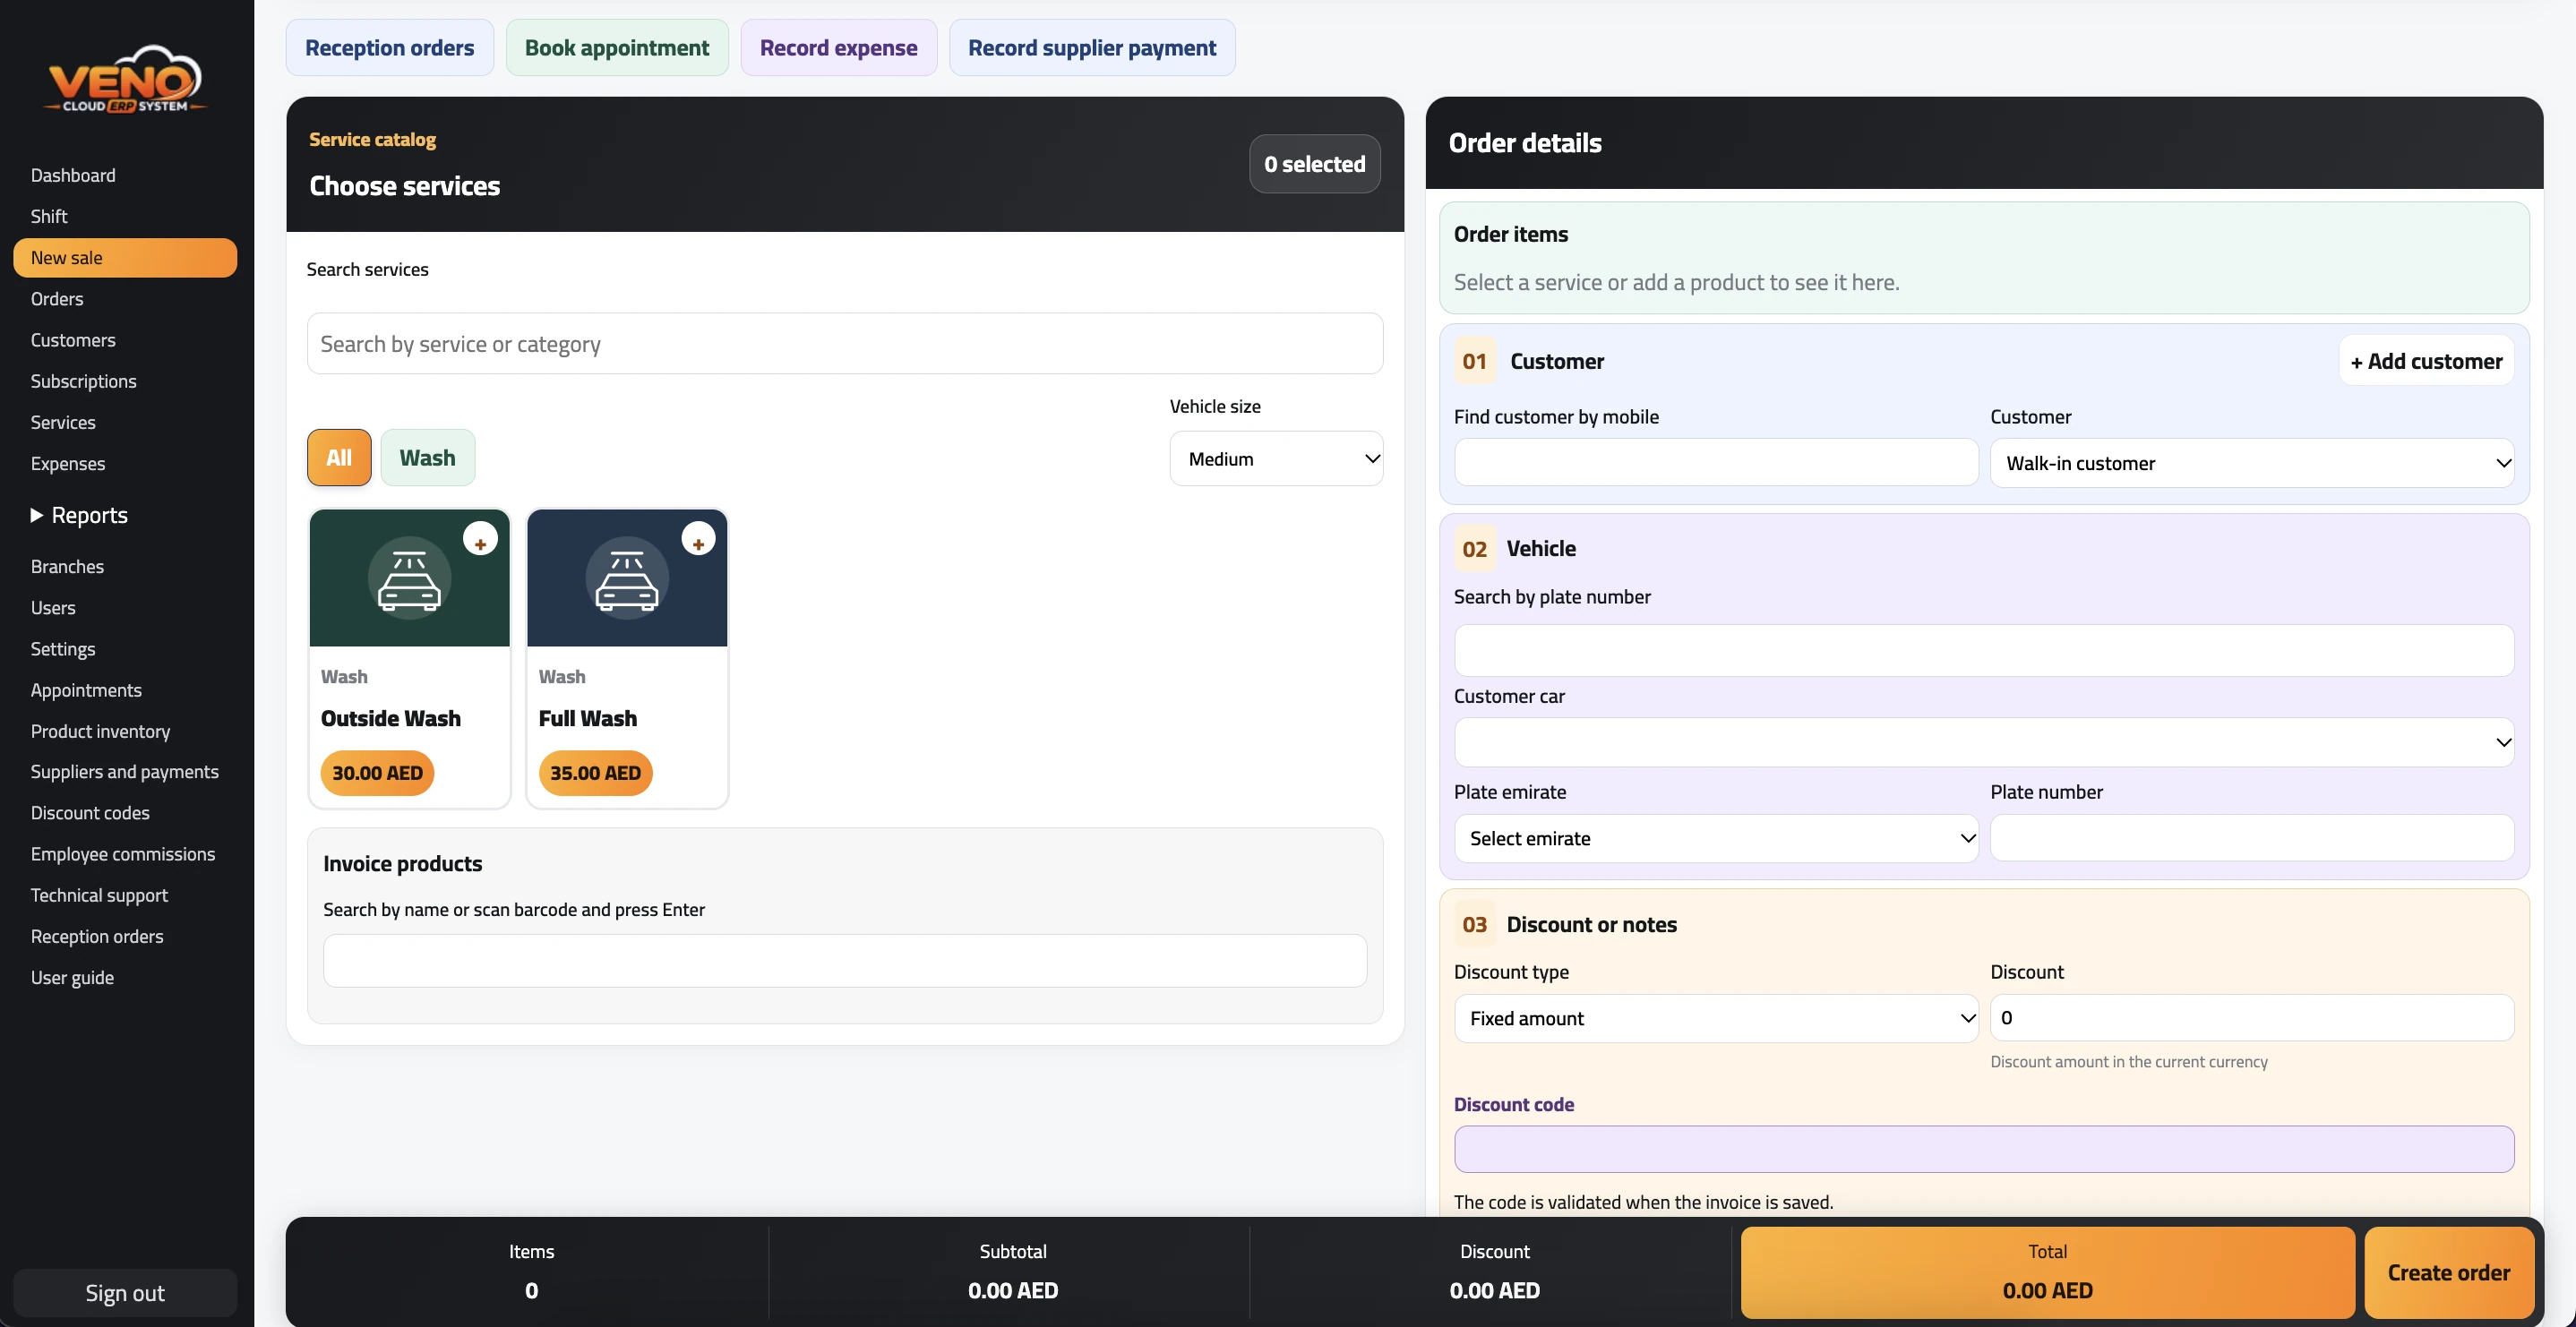 Create a wash order · Select the image to enlarge
- Select one or more services.
- Select the customer and vehicle, or add them on the same screen.
- Reception sends a ticket to the cashier. The cashier opens Reception Orders, reviews the ticket, and creates the invoice.
- Choose the plate emirate, number, and vehicle size when needed.
- Review services, products, quantities, discount, and notes, then create the order.
Tip: Service prices change automatically according to vehicle size.
04
Invoice and collection
Track the wash and record a single or split payment.
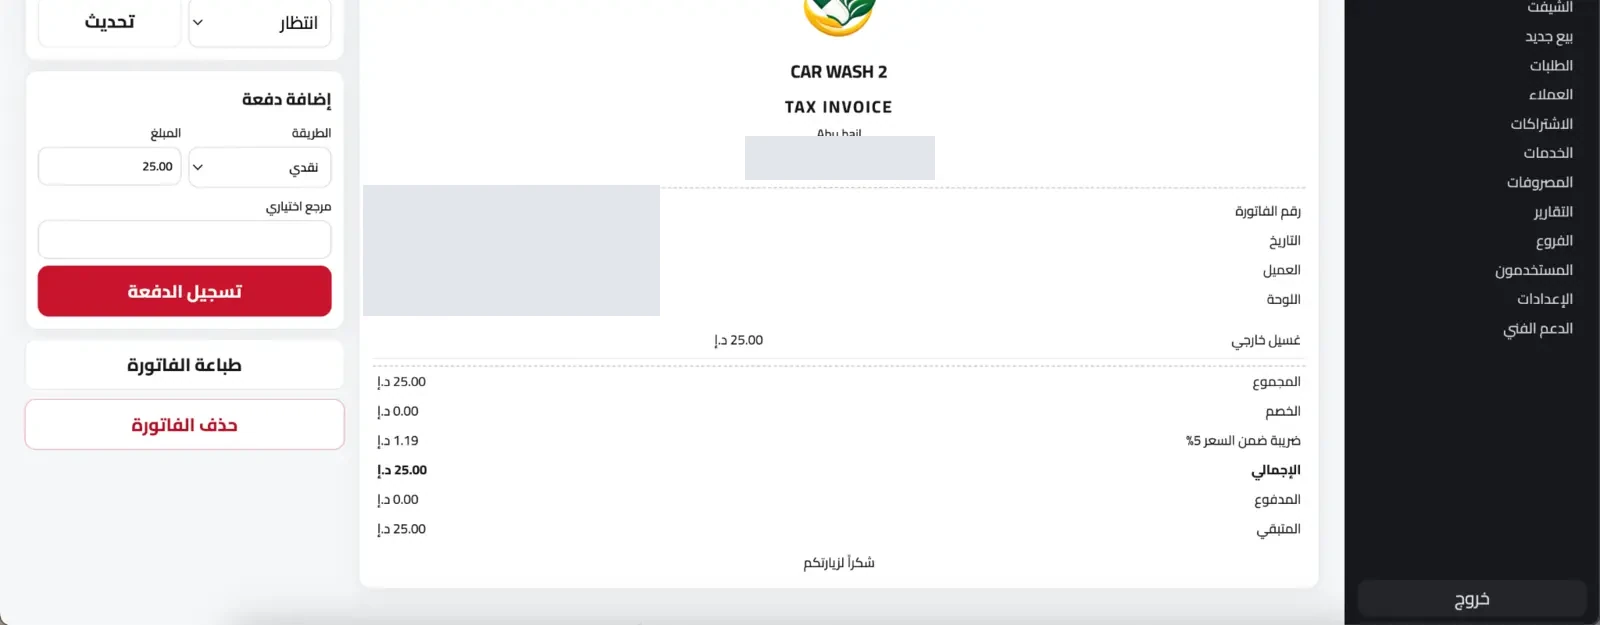 Invoice and collection · Select the image to enlarge
- Move the order through Waiting, Washing, Ready, and Completed.
- Choose a payment method and amount; repeat for split payment.
- Confirm the remaining balance and print. Branch print settings control A4, A5, 80 mm, and 58 mm choices.
- A cashier needs a manager or owner PIN to edit or delete an existing invoice. The approver is logged.
Tip: TAX INVOICE, branch logo, and tax follow the branch settings.
Print preview
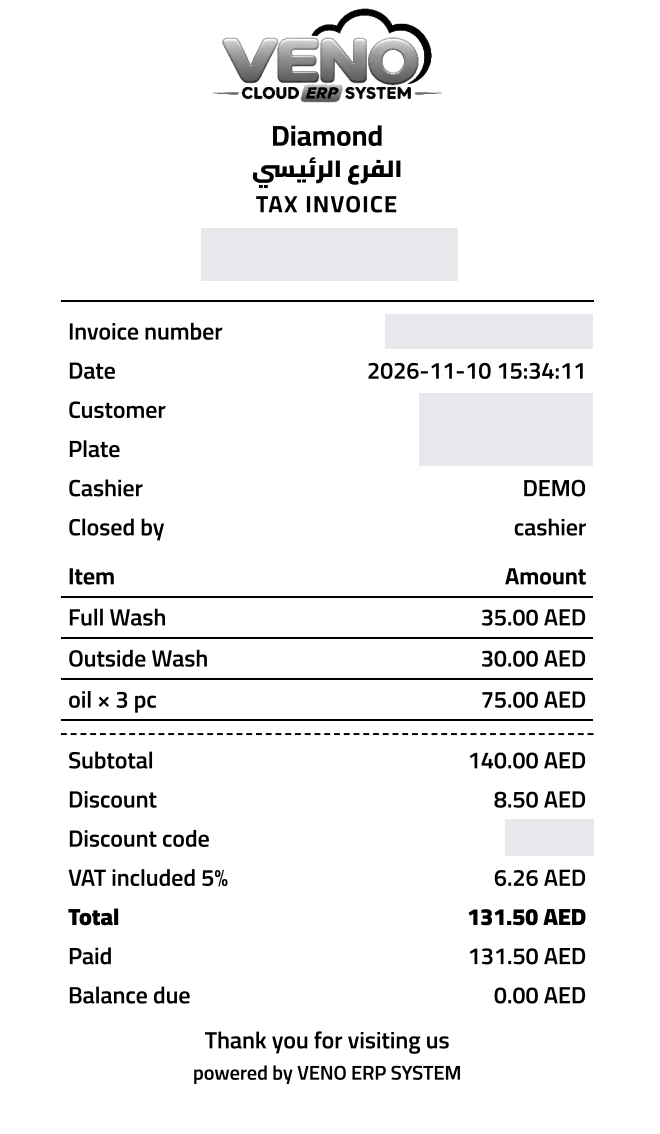 Printed invoice sample · Select to enlarge
05
Orders
Follow every invoice and wash status from one place.
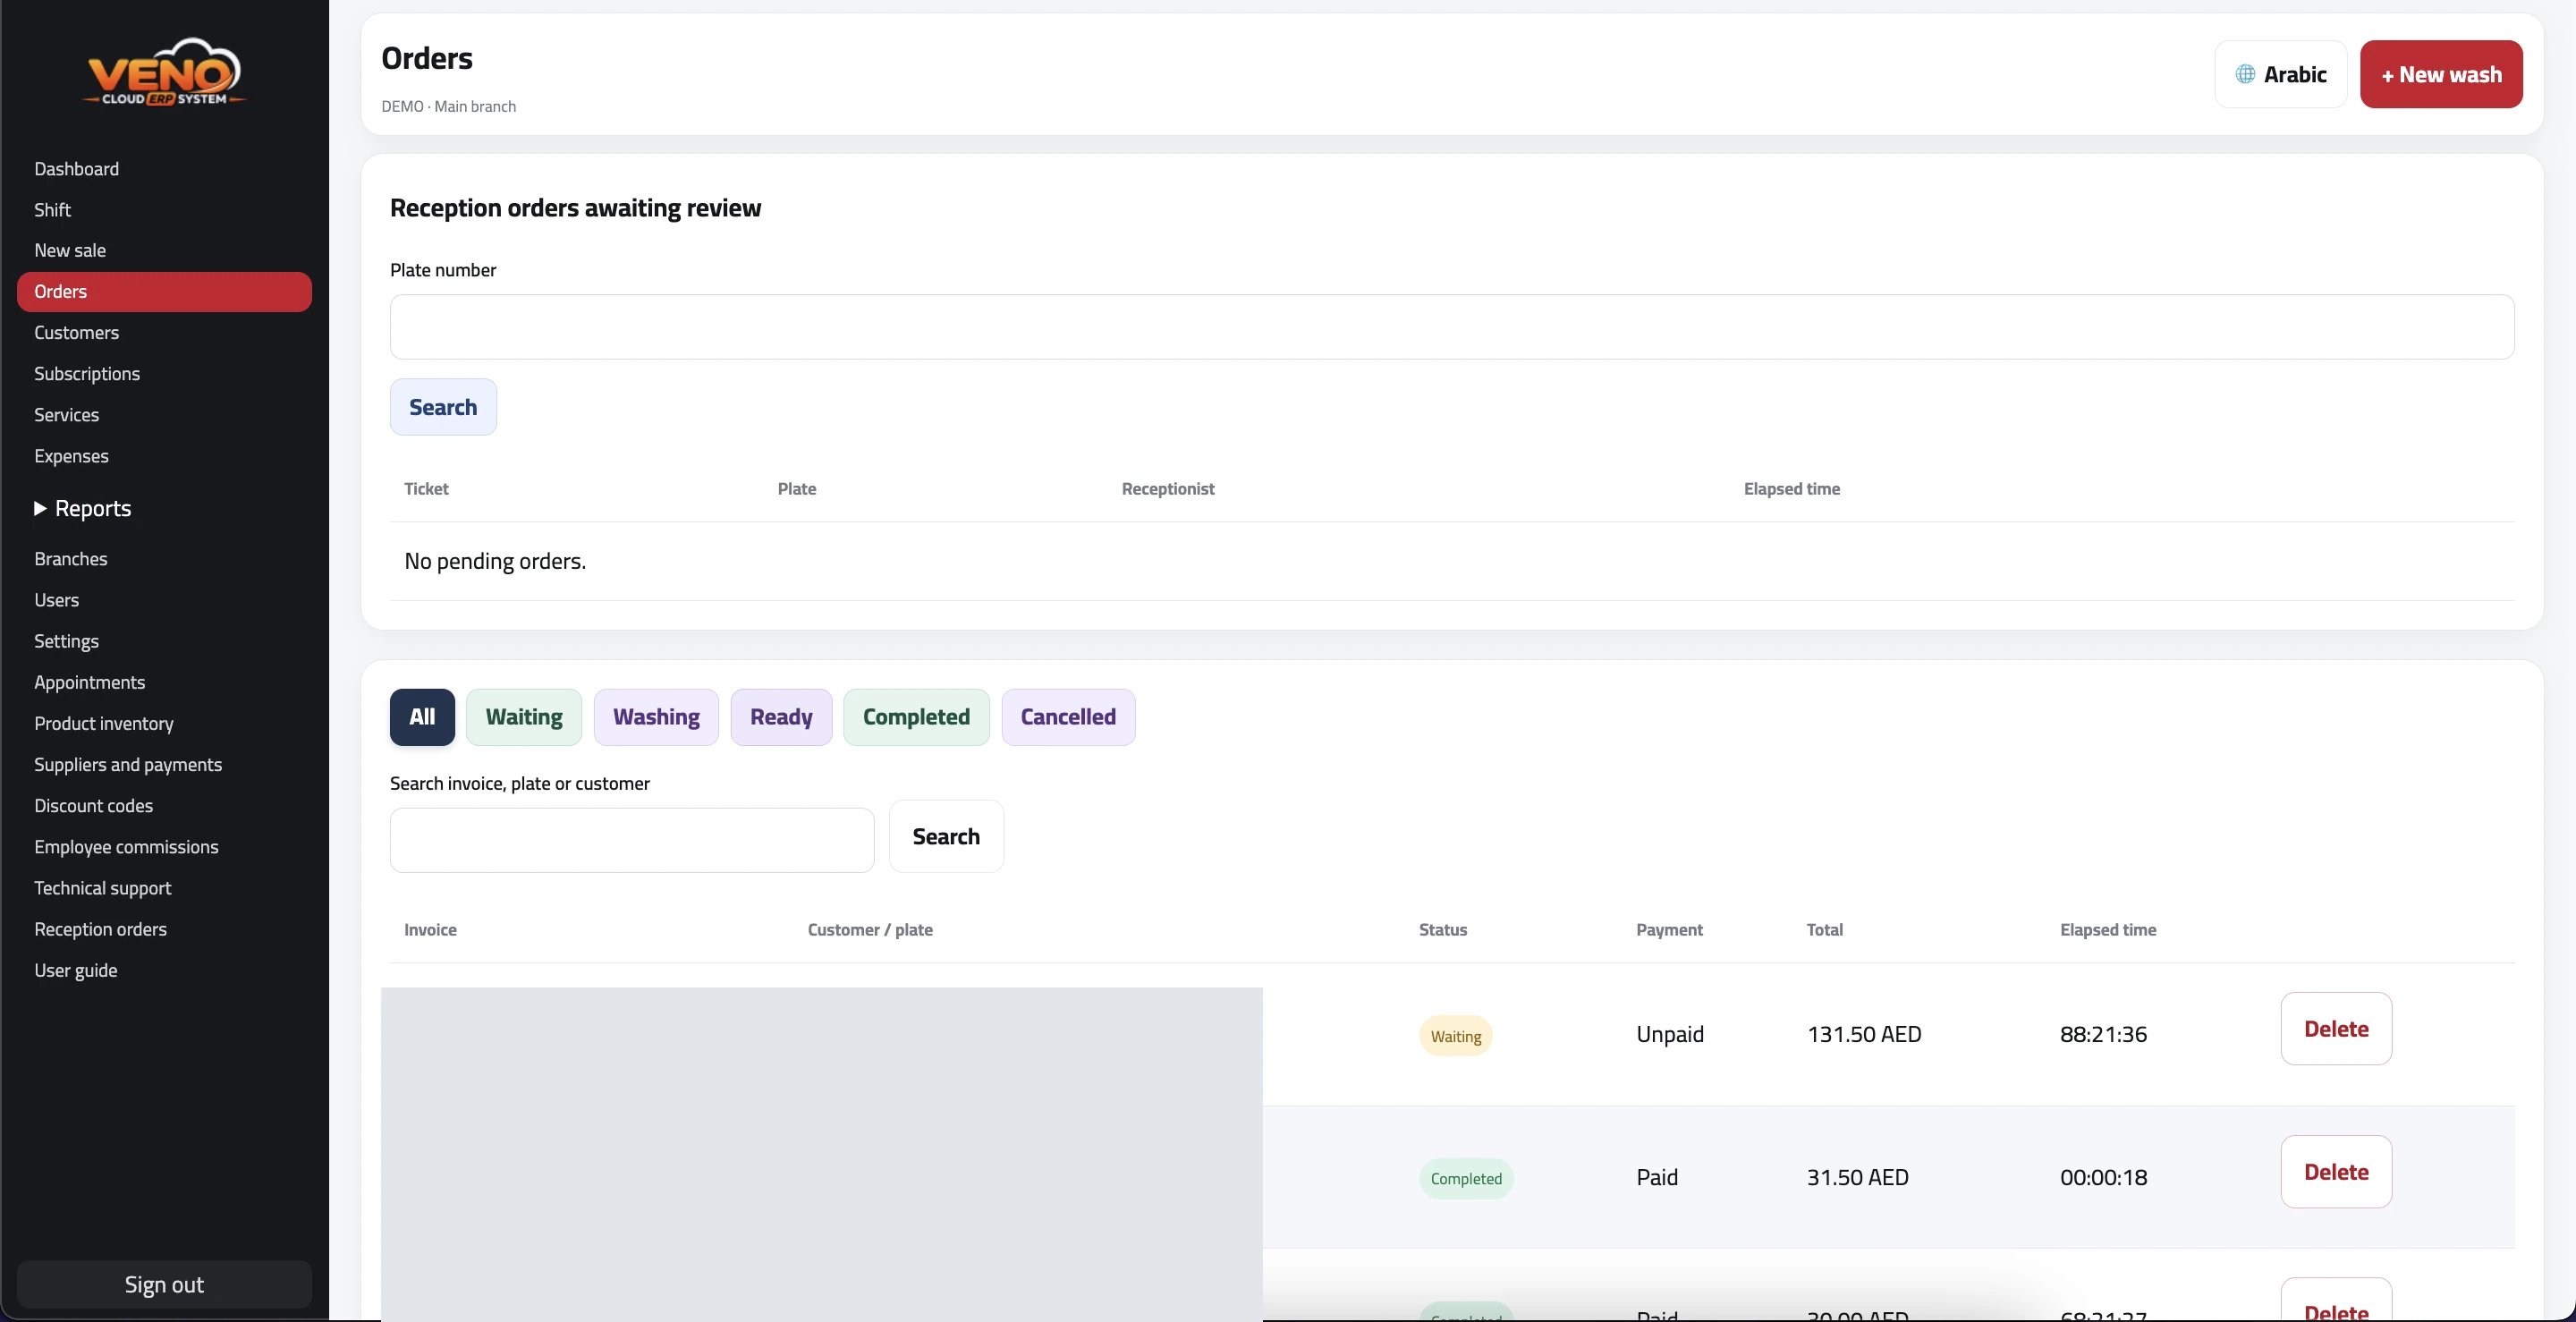 Orders · Select the image to enlarge
- Use All, Waiting, Washing, Ready, and Completed filters.
- Search pending reception tickets by plate or invoices by number, customer, or plate.
- Watch elapsed time from registration until completion. Refresh the list after status changes on another device.
- Select an invoice number to open, update, or print it.
Tip: Users see only their company and authorized branch data.
06
Customers and vehicles
Link multiple vehicles to the same customer.
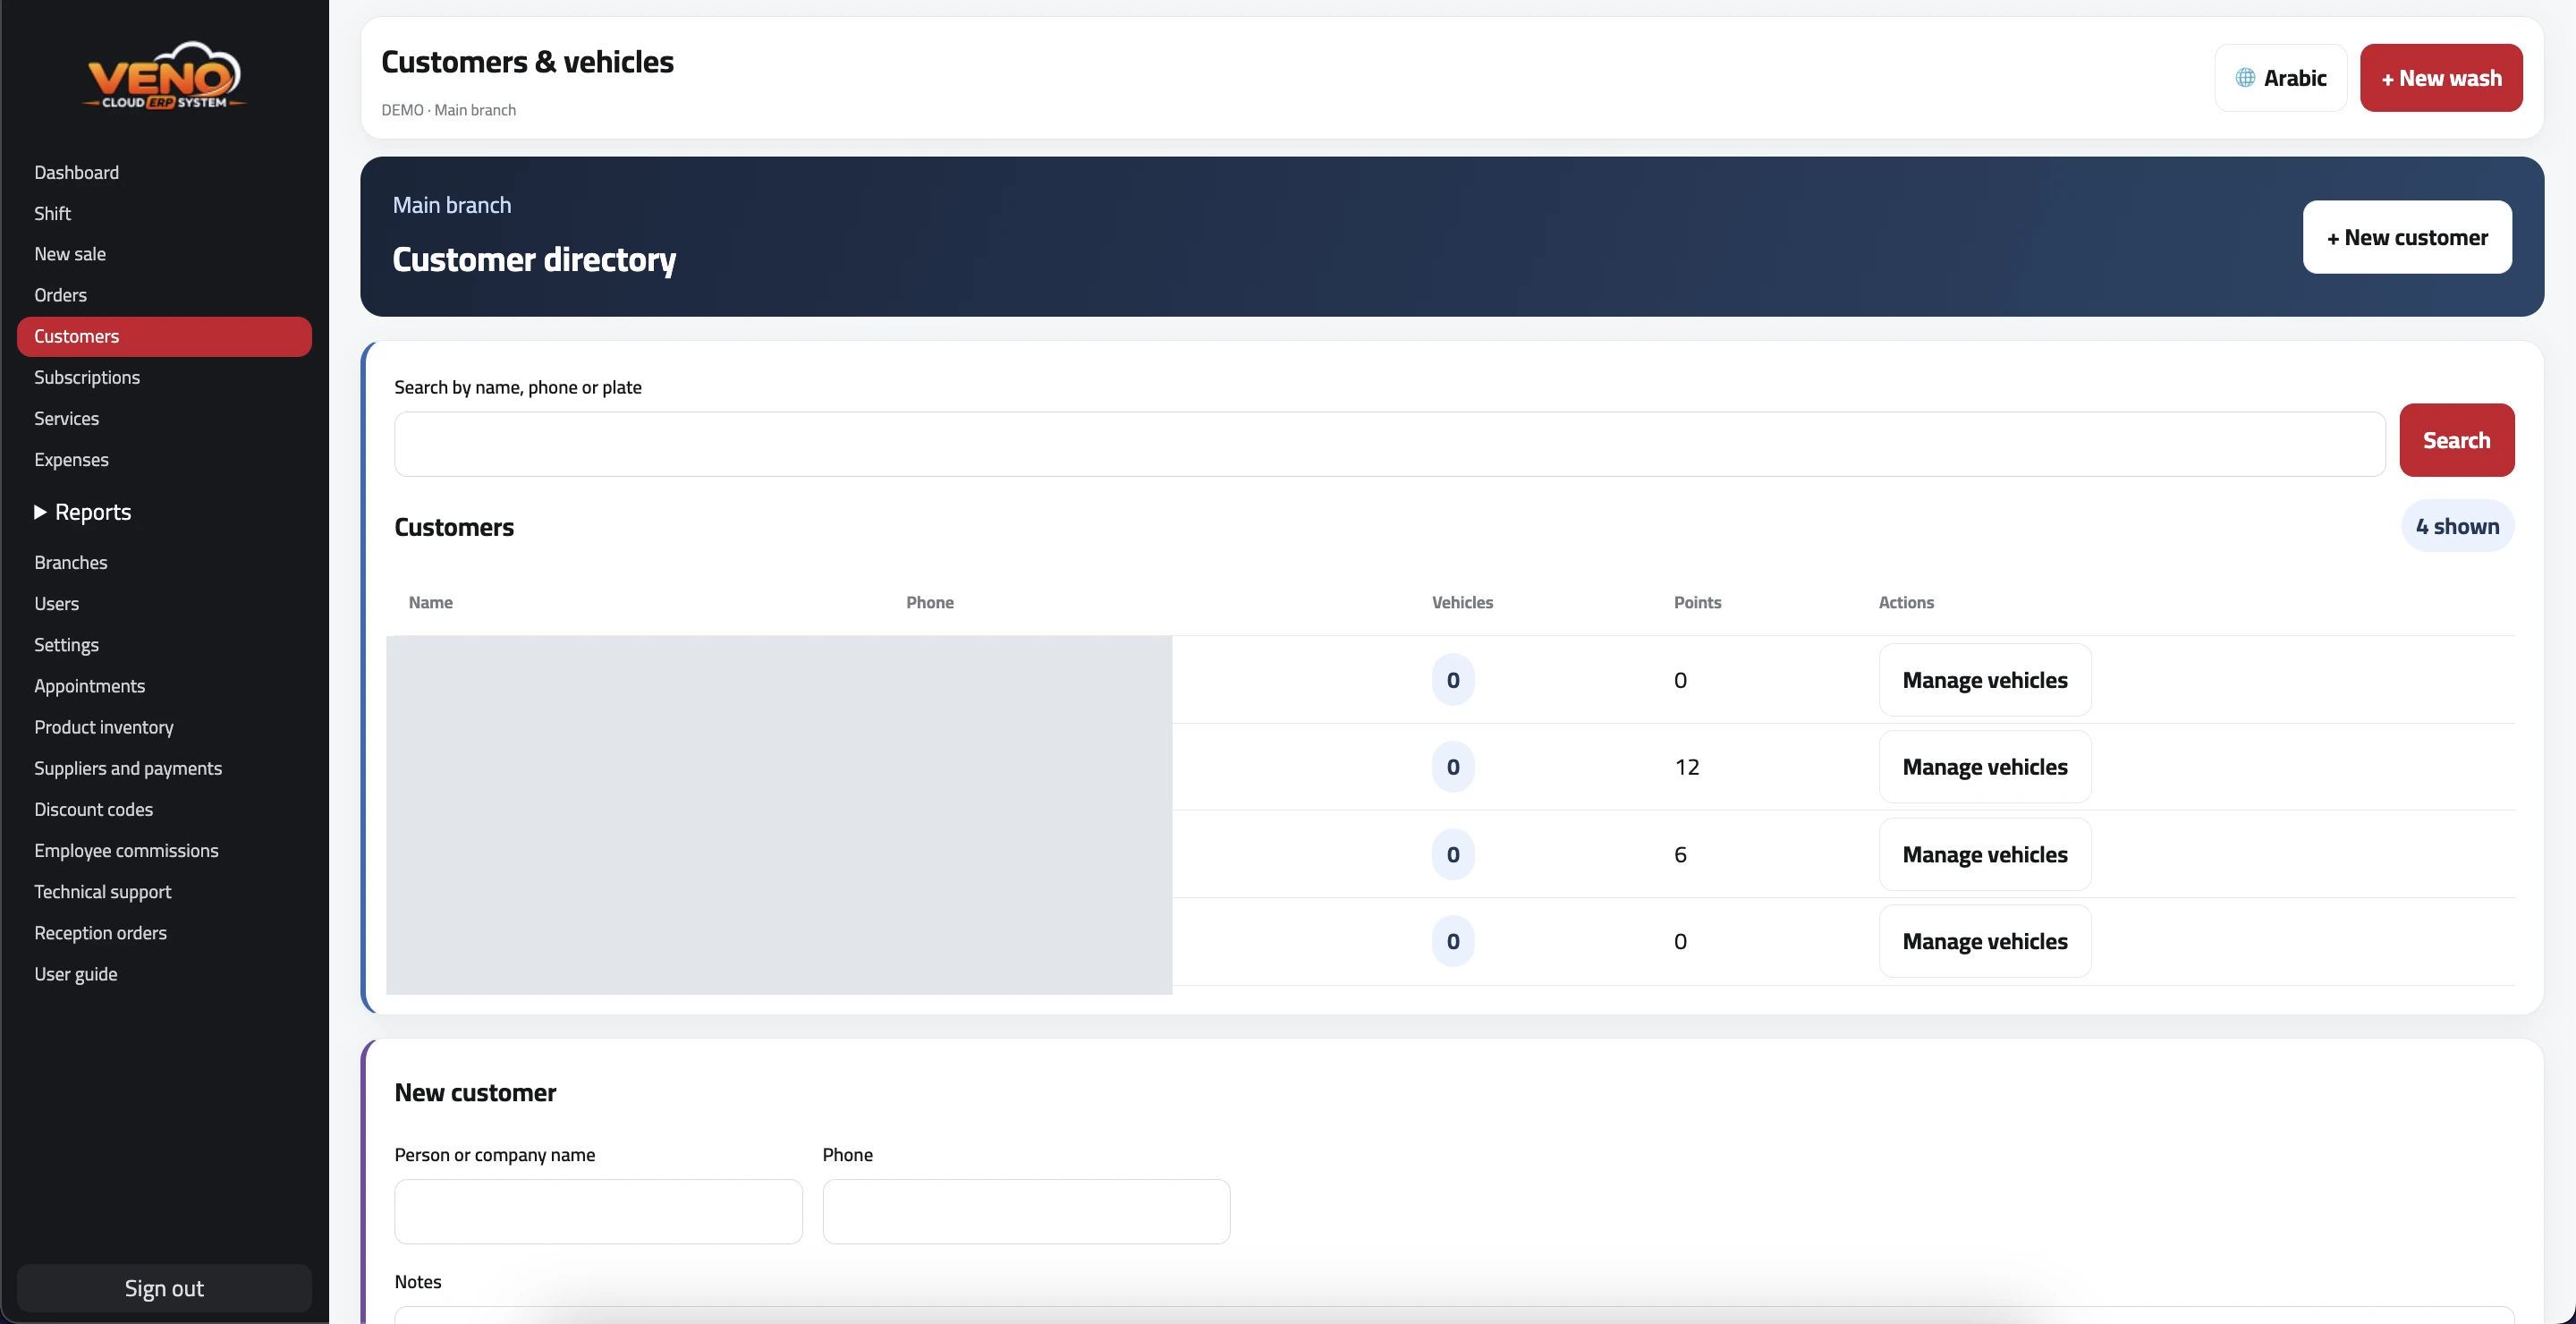 Customers and vehicles · Select the image to enlarge
- Search by name, phone, or plate before adding a customer.
- Save customer details, then add their vehicles.
- Save emirate, plate, make, model, and size for each vehicle.
- Edit or delete data according to permission.
Tip: Selecting a vehicle loads its size and correct service price.
07
Customer subscriptions
Create and track customer wash packages.
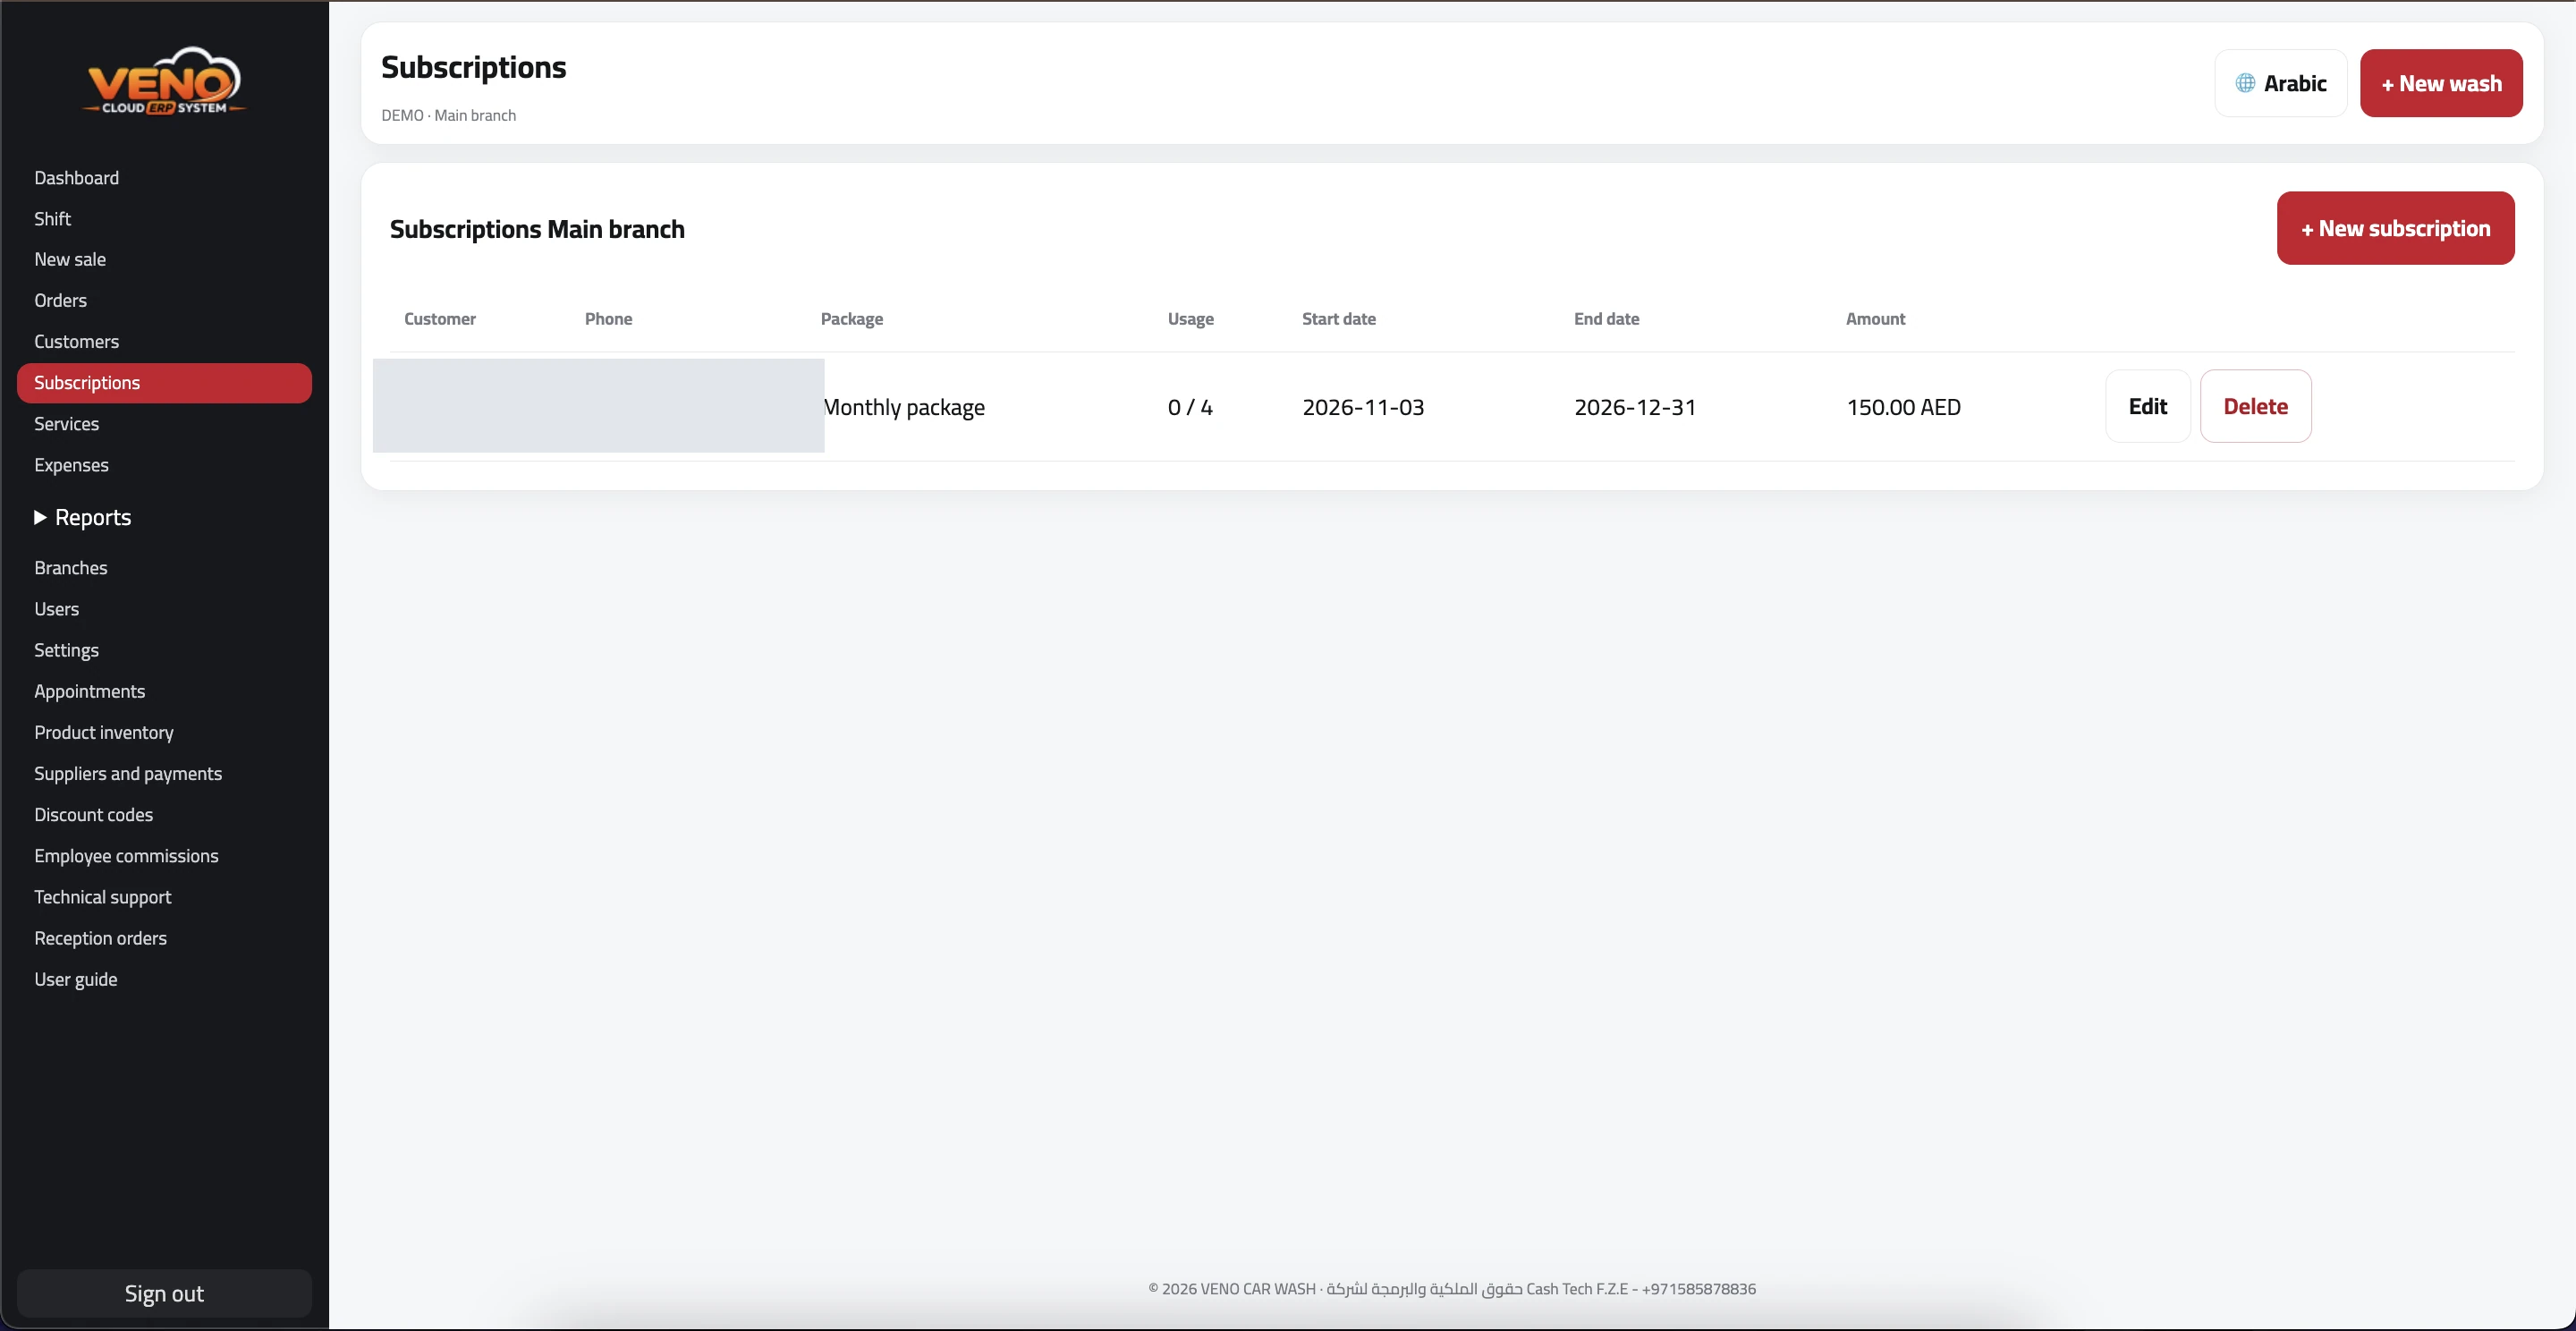 Customer subscriptions · Select the image to enlarge
- Select New Subscription and choose customer, vehicle, and package.
- Set uses, dates, and subscription value.
- Track consumed and remaining uses and status.
- Edit or delete according to permission.
Tip: Confirm the plate before consuming a visit.
08
Services and prices
Manage bilingual services and vehicle-size pricing.
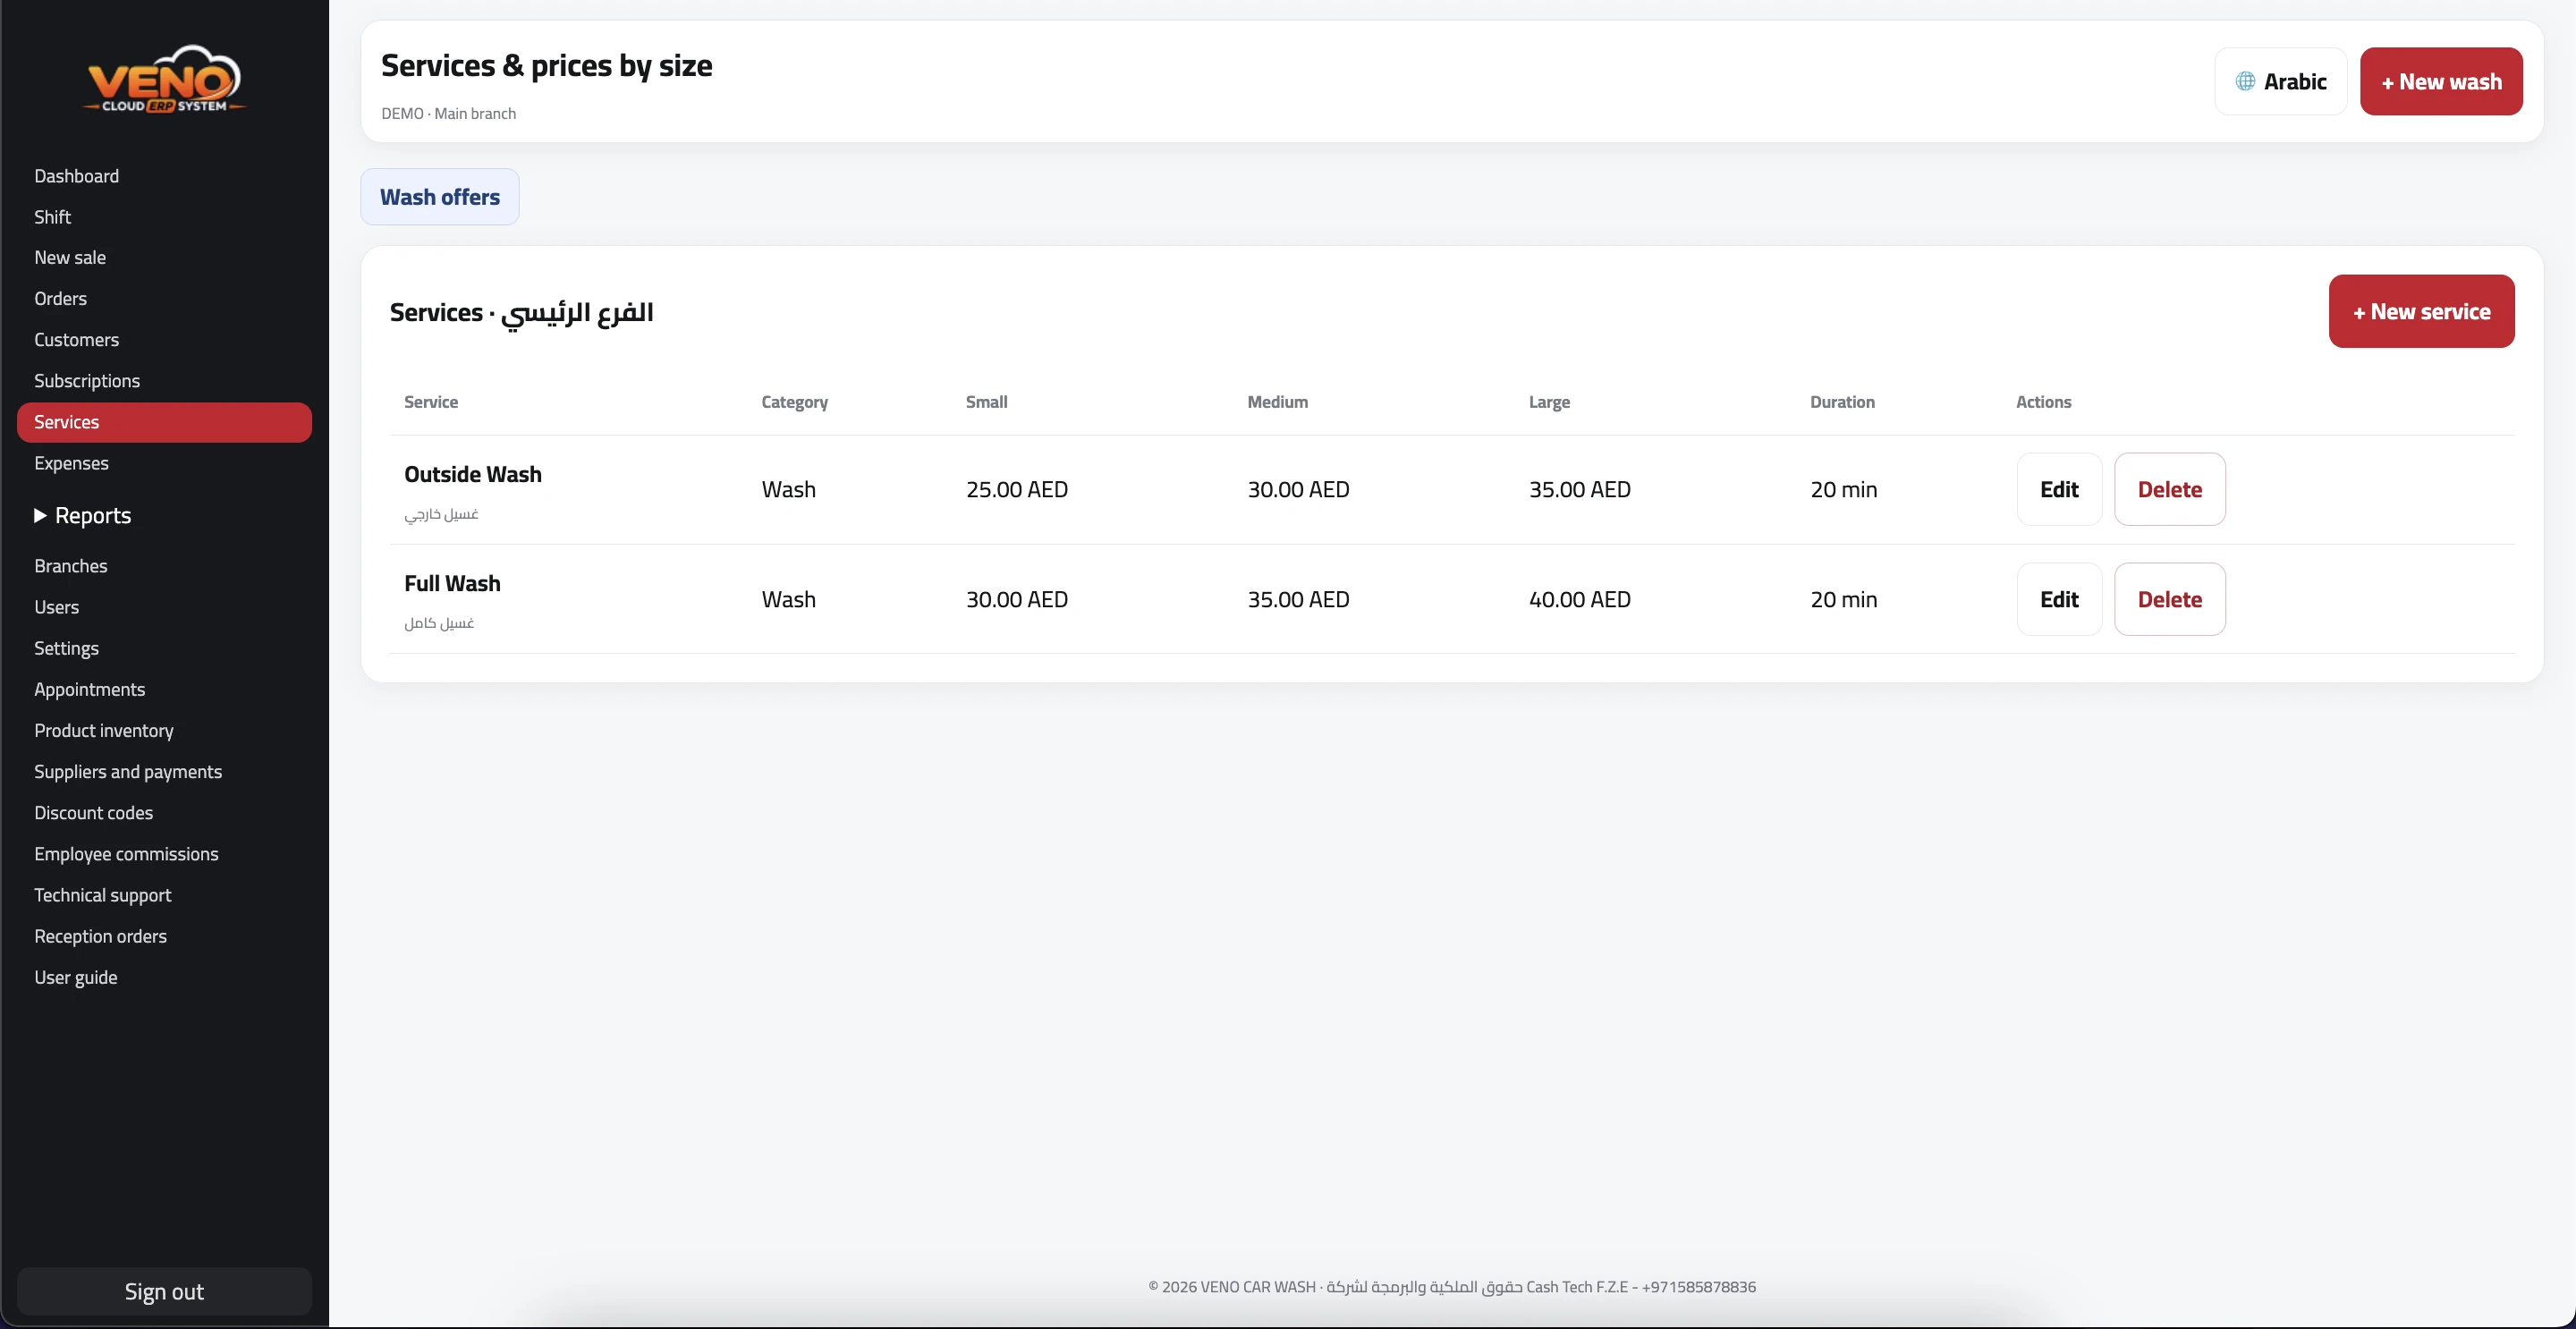 Services and prices · Select the image to enlarge
- Enter Arabic and English names, category, and duration.
- Set prices for small, medium, and large vehicles.
- Enable or disable visibility on the sales screen.
- Use Edit or Delete when permitted.
Tip: Enter both names so the service displays correctly in either language.
09
Expenses
Record branch expenses for reports and shift reconciliation.
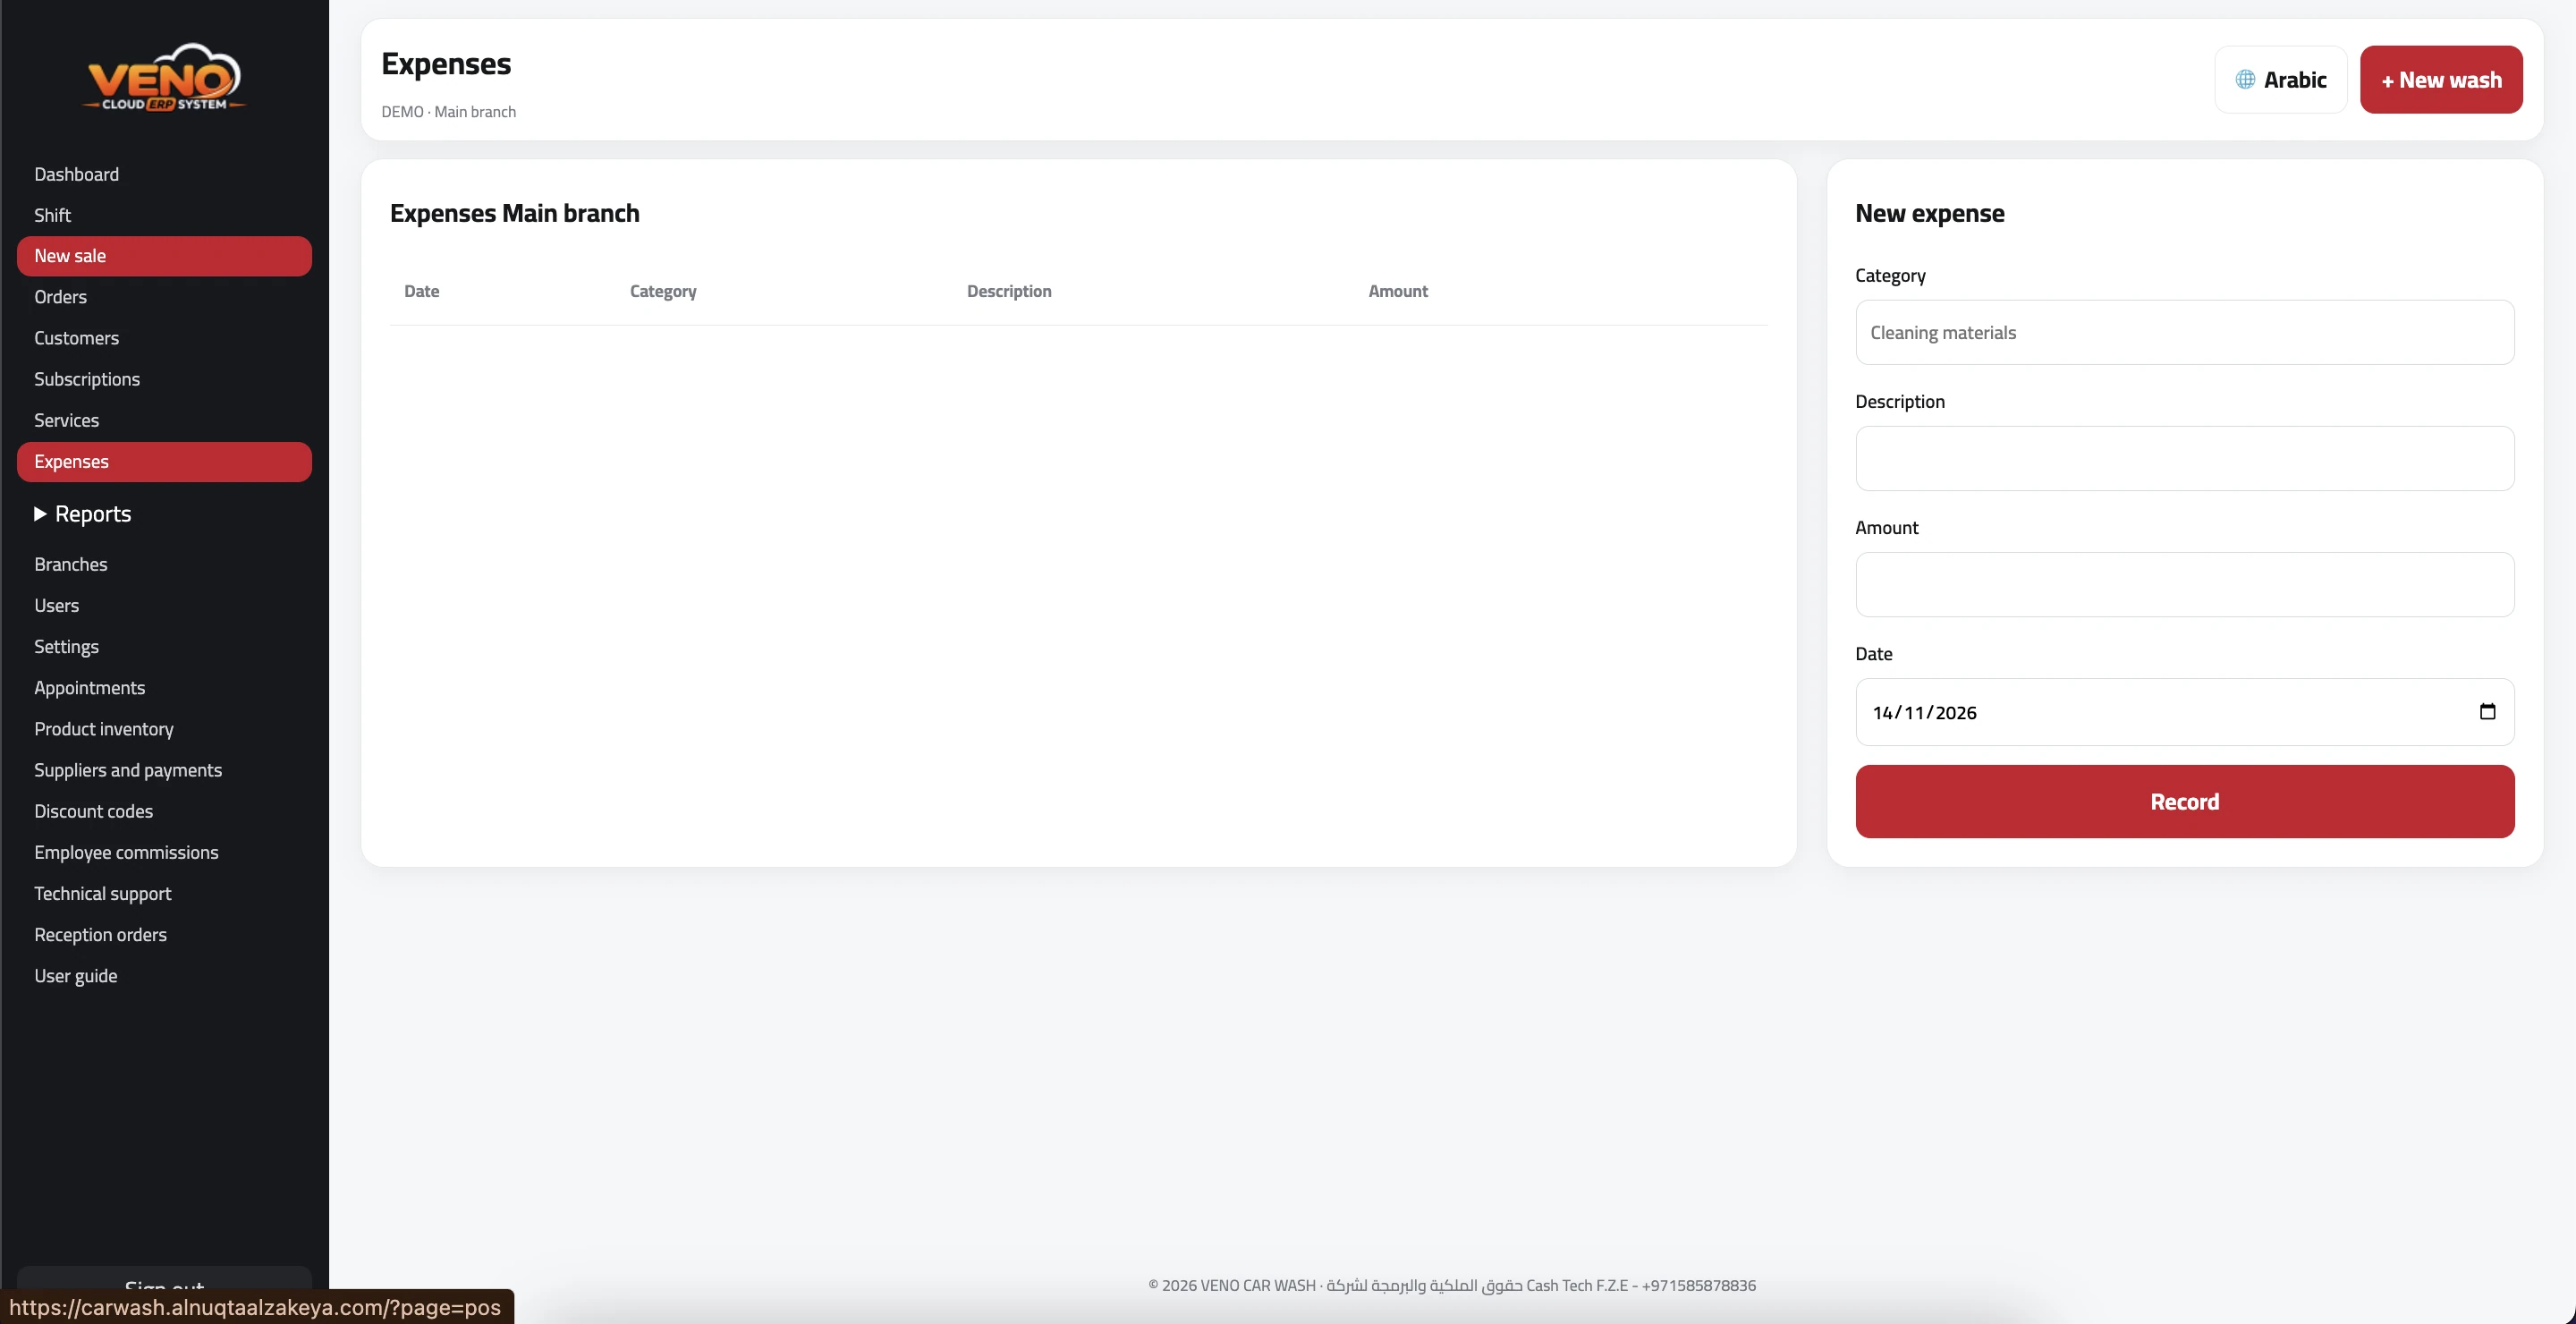 Expenses · Select the image to enlarge
- Enter category, description, amount, and date, then record.
- Review expenses for the selected branch.
- Managers can edit or delete when permitted.
Tip: Record expenses on the day they occur.
10
Reports
Sales, expense, subscription, and shift reports.
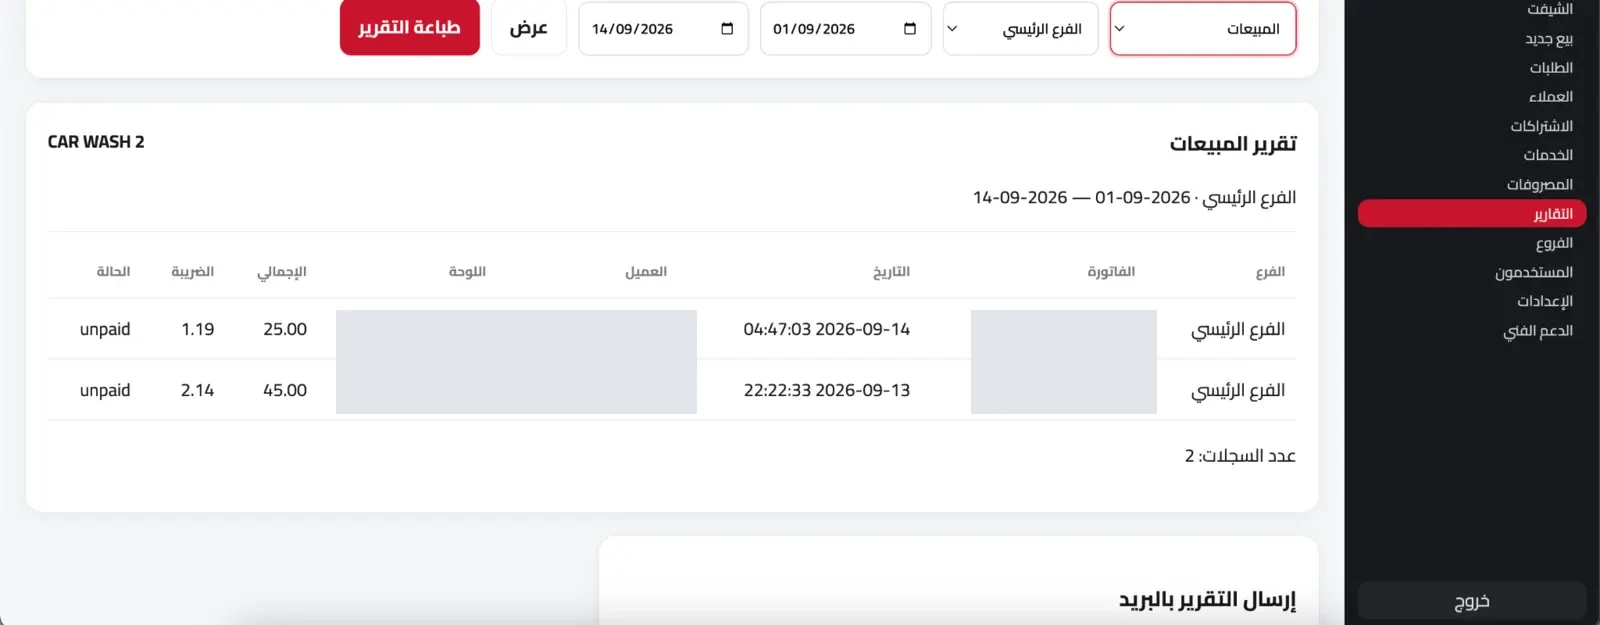 Reports · Select the image to enlarge
- Choose report type, branch, and date range.
- Review totals, payment methods, tax, and net movement.
- Use Print for paper or PDF output.
- Use Email to share the report.
Tip: For one full day, use the same From and To date.
11
Branches
Manage branches with isolated branch data.
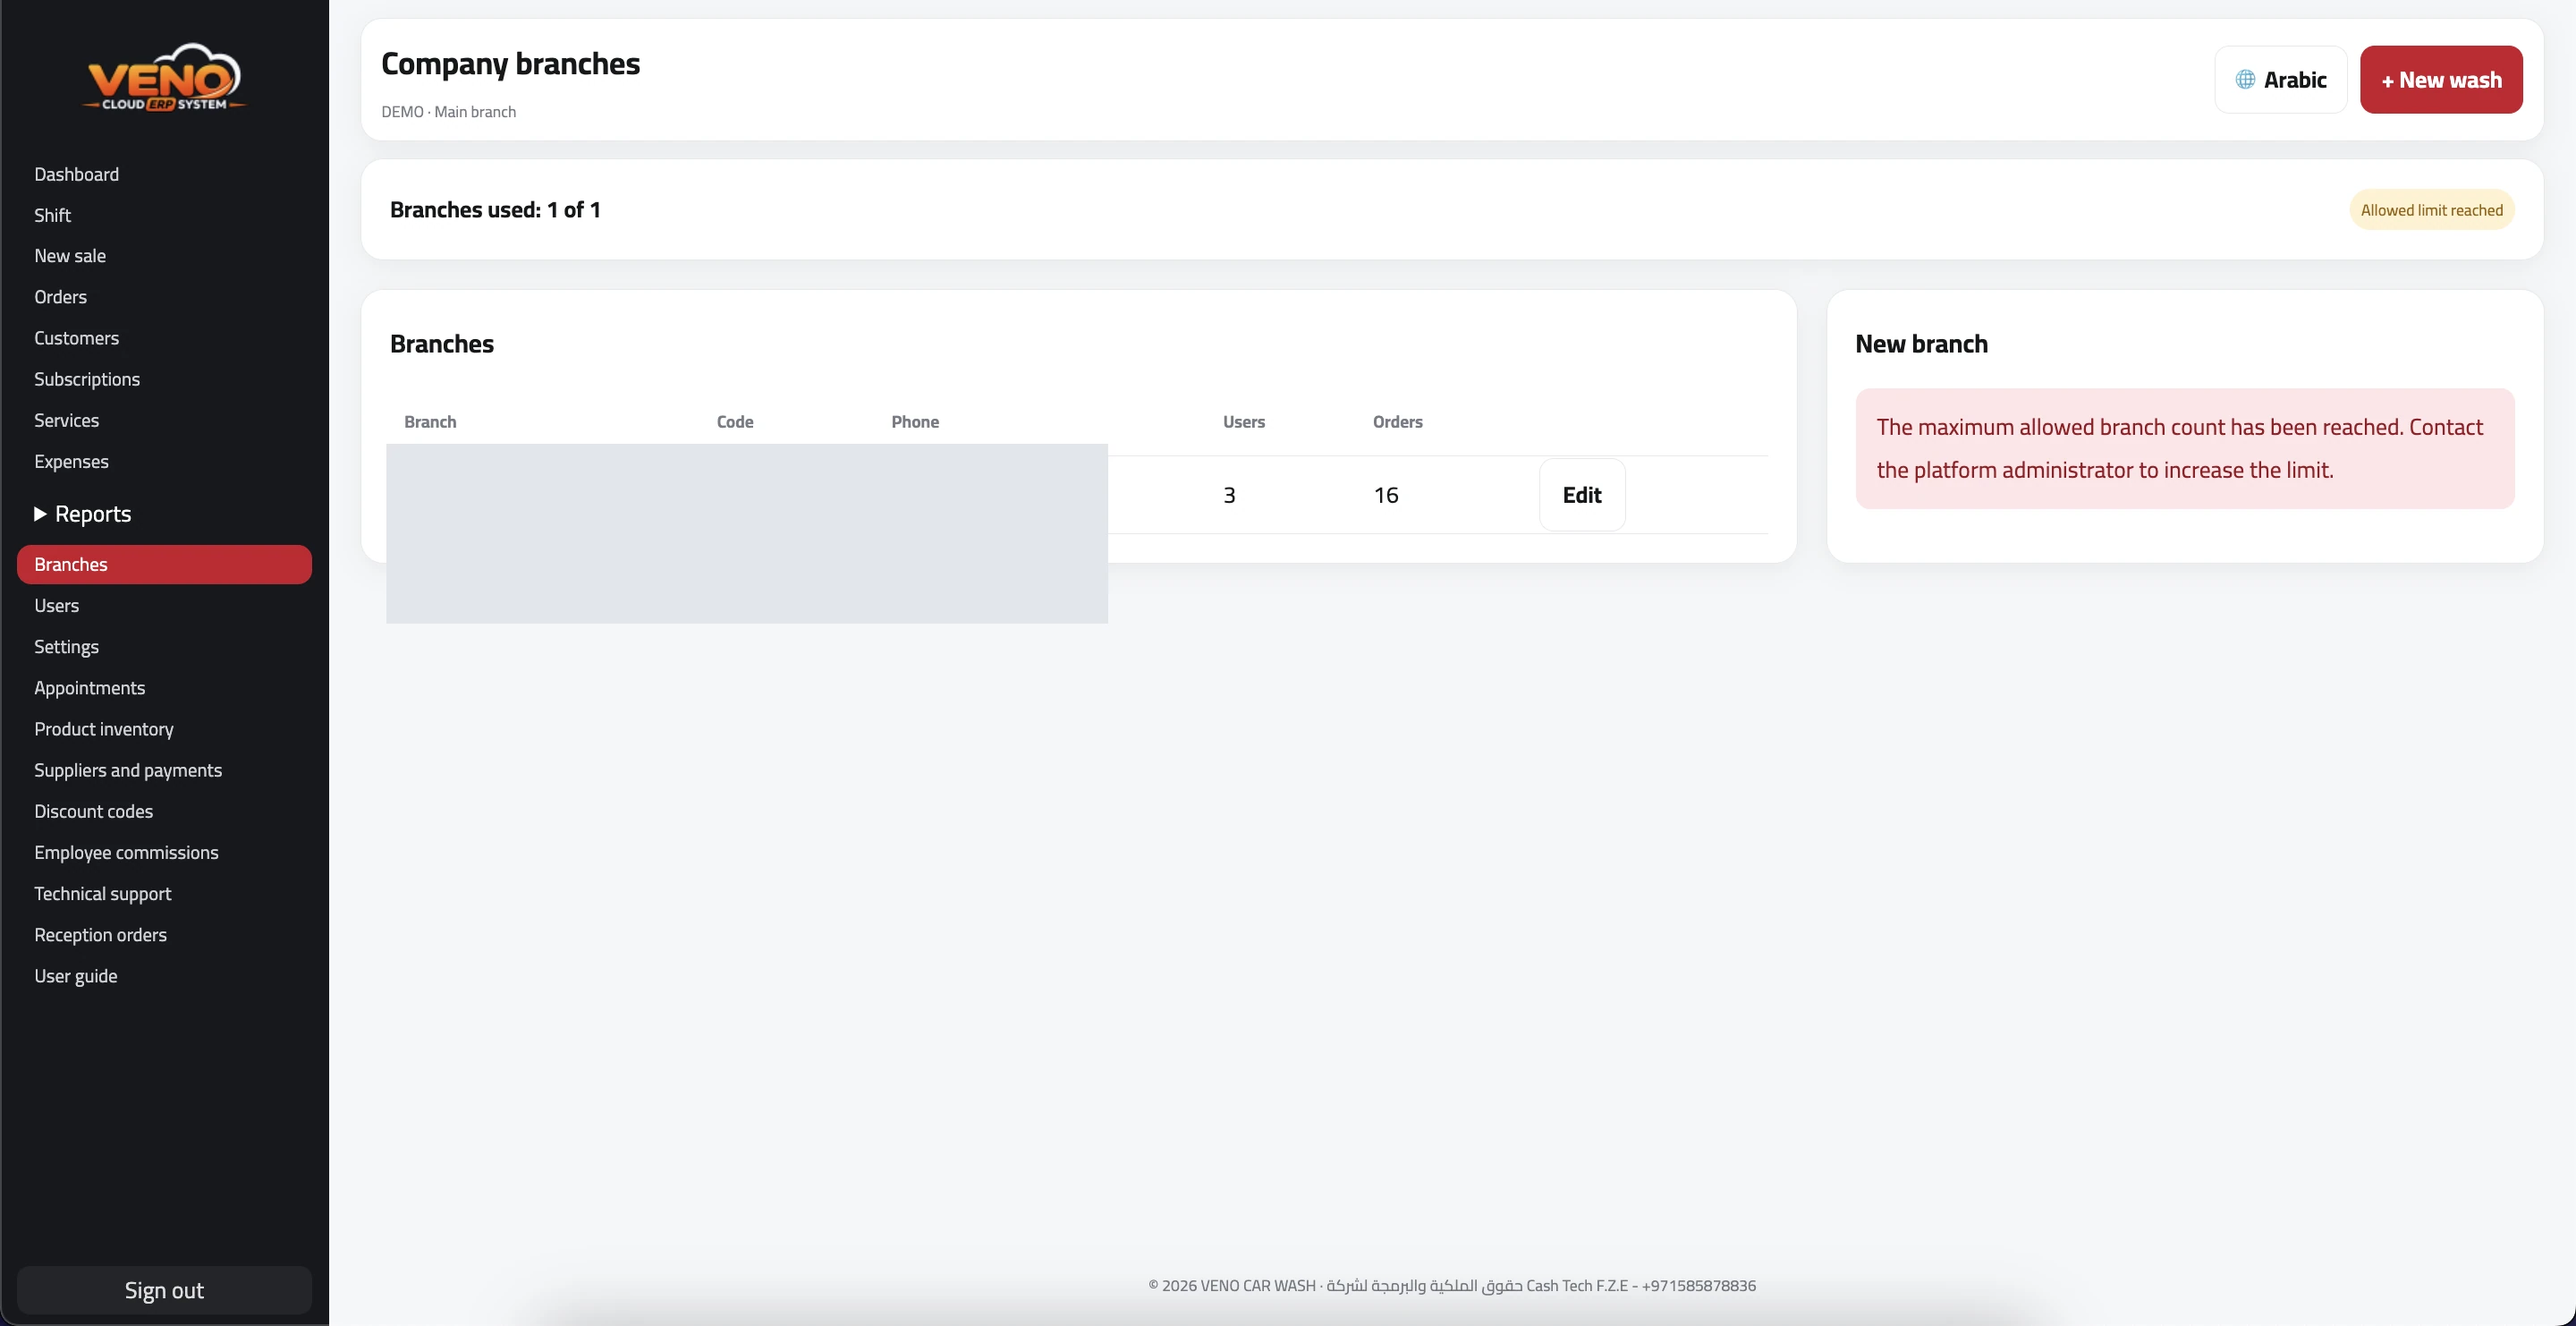 Branches · Select the image to enlarge
- Add a branch and enter name, code, address, and phone.
- Copy current services as an independent starting catalog.
- Edit branch details or status from the list.
- The SaaS branch allowance cannot be exceeded.
Tip: Available to the company owner or authorized users.
12
Users and permissions
Separate accounts and appropriate employee access.
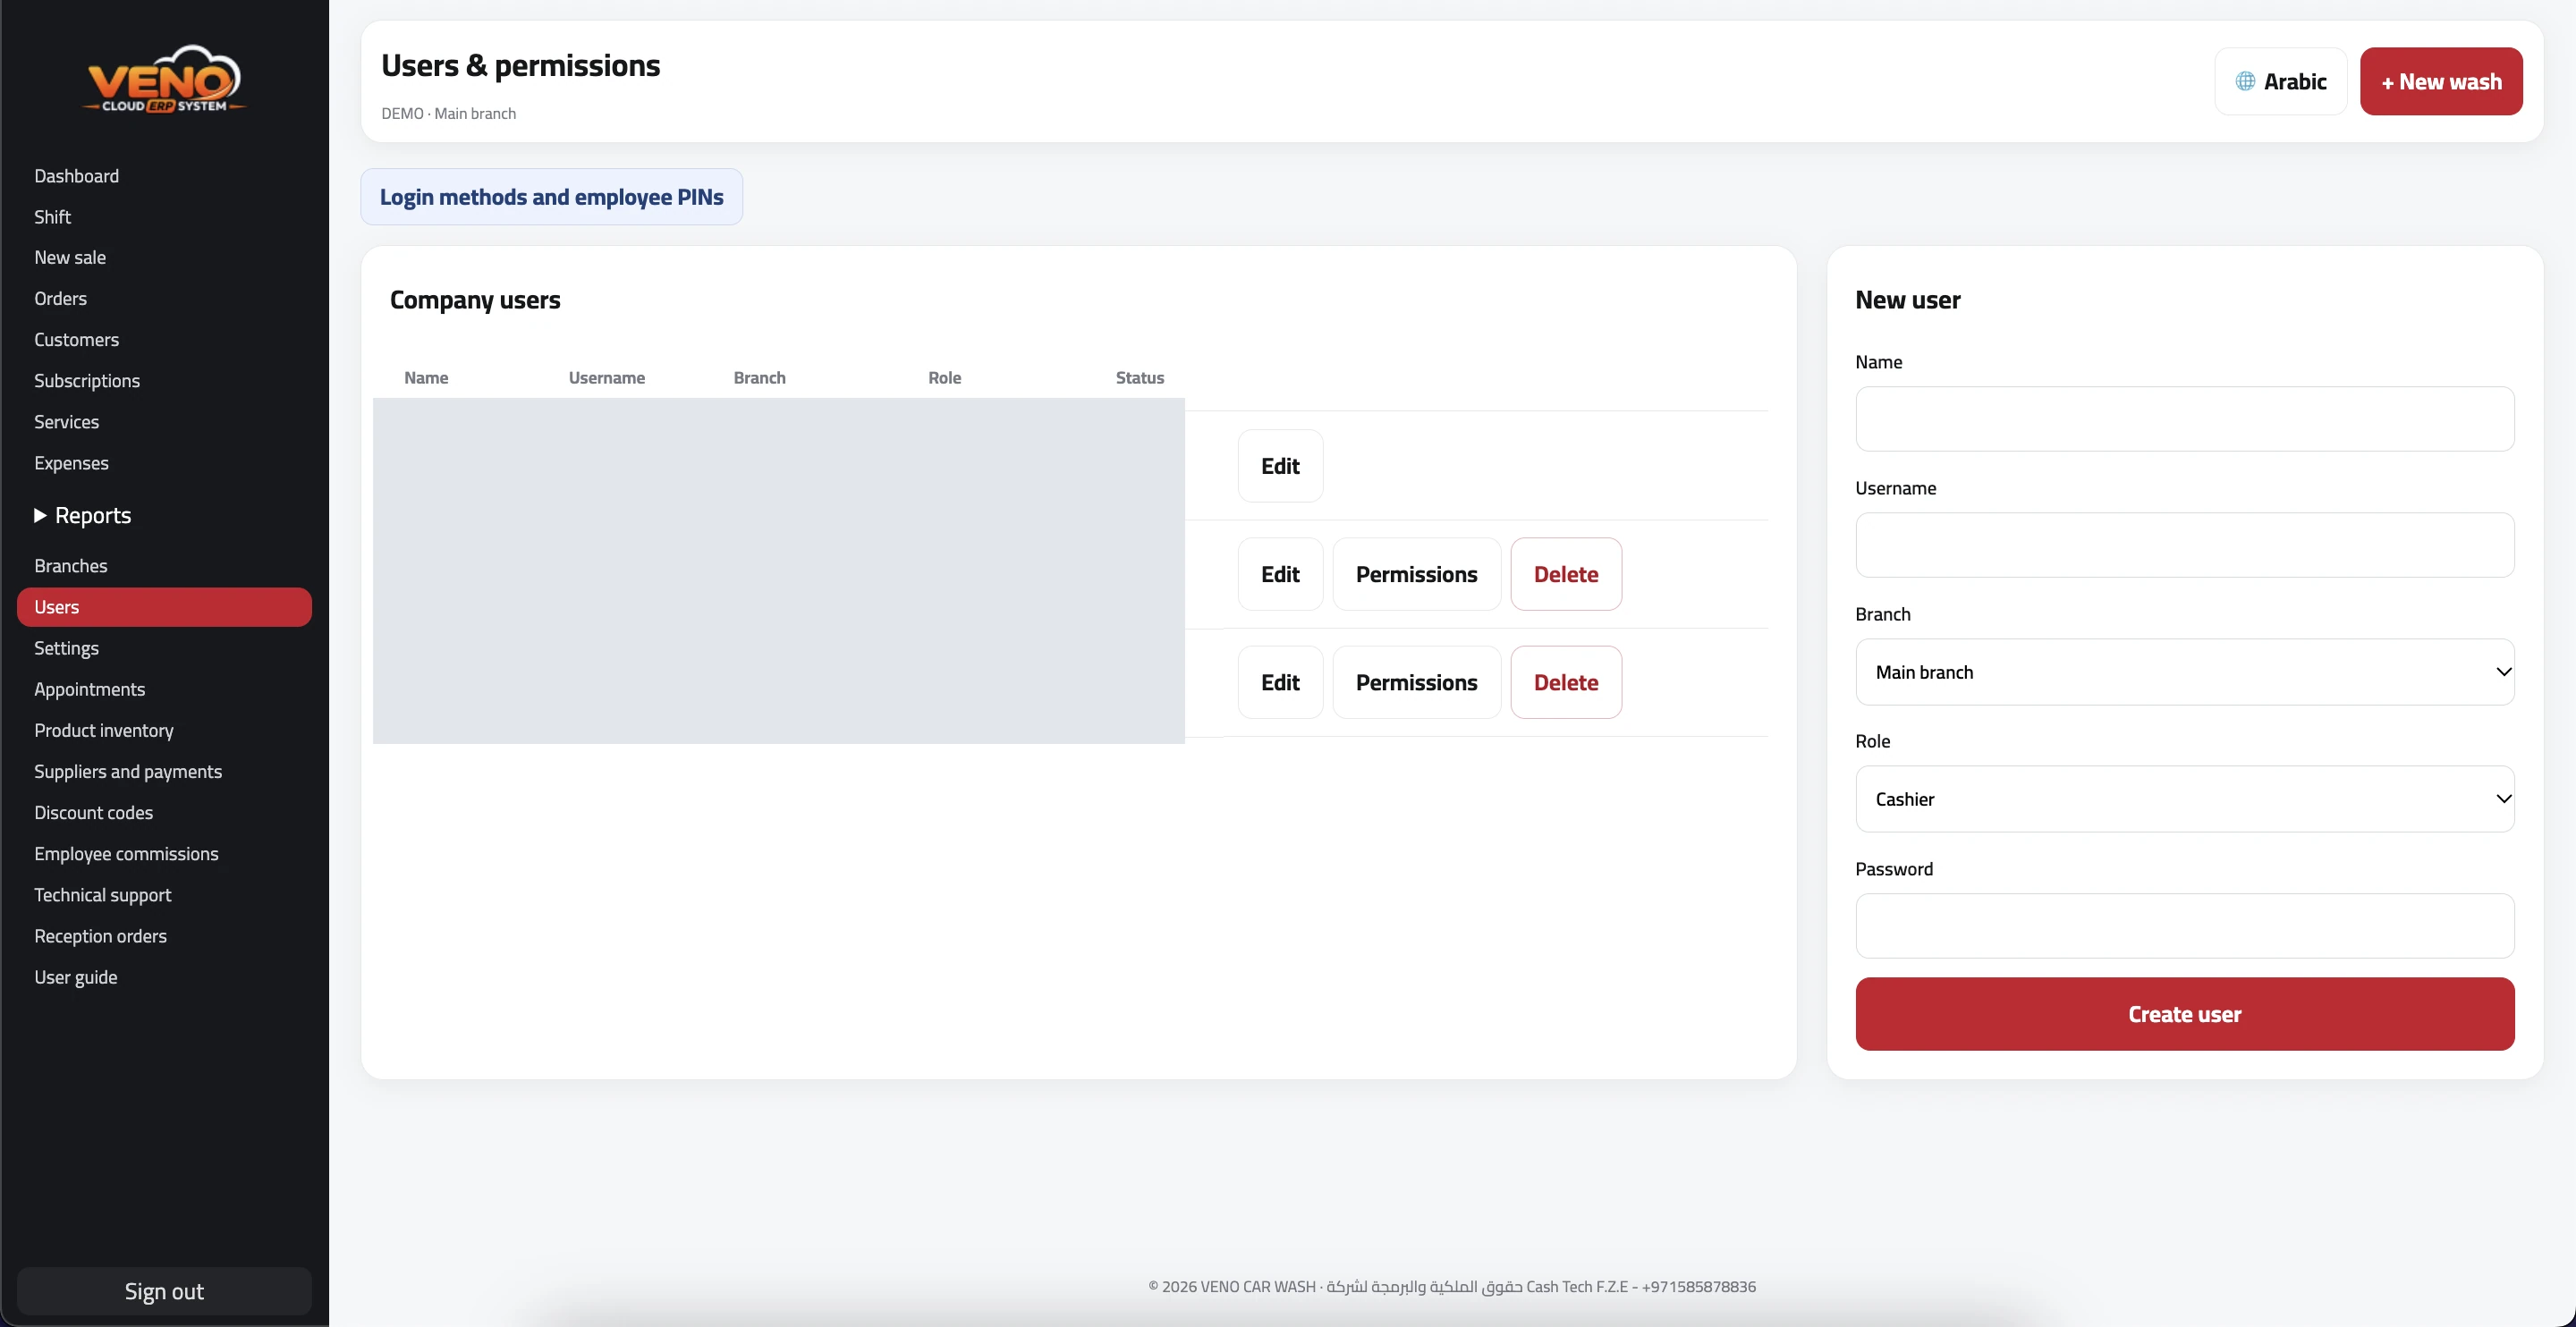 Users and permissions · Select the image to enlarge
- Enter name, username, and password.
- Choose branch and role: receptionist, cashier, manager, or owner.
- Edit details, password, role, or status.
- Disable accounts immediately when employment ends.
Tip: Never share the owner account with cashiers.
13
Employee permissions
Choose which screens and actions an account can access.
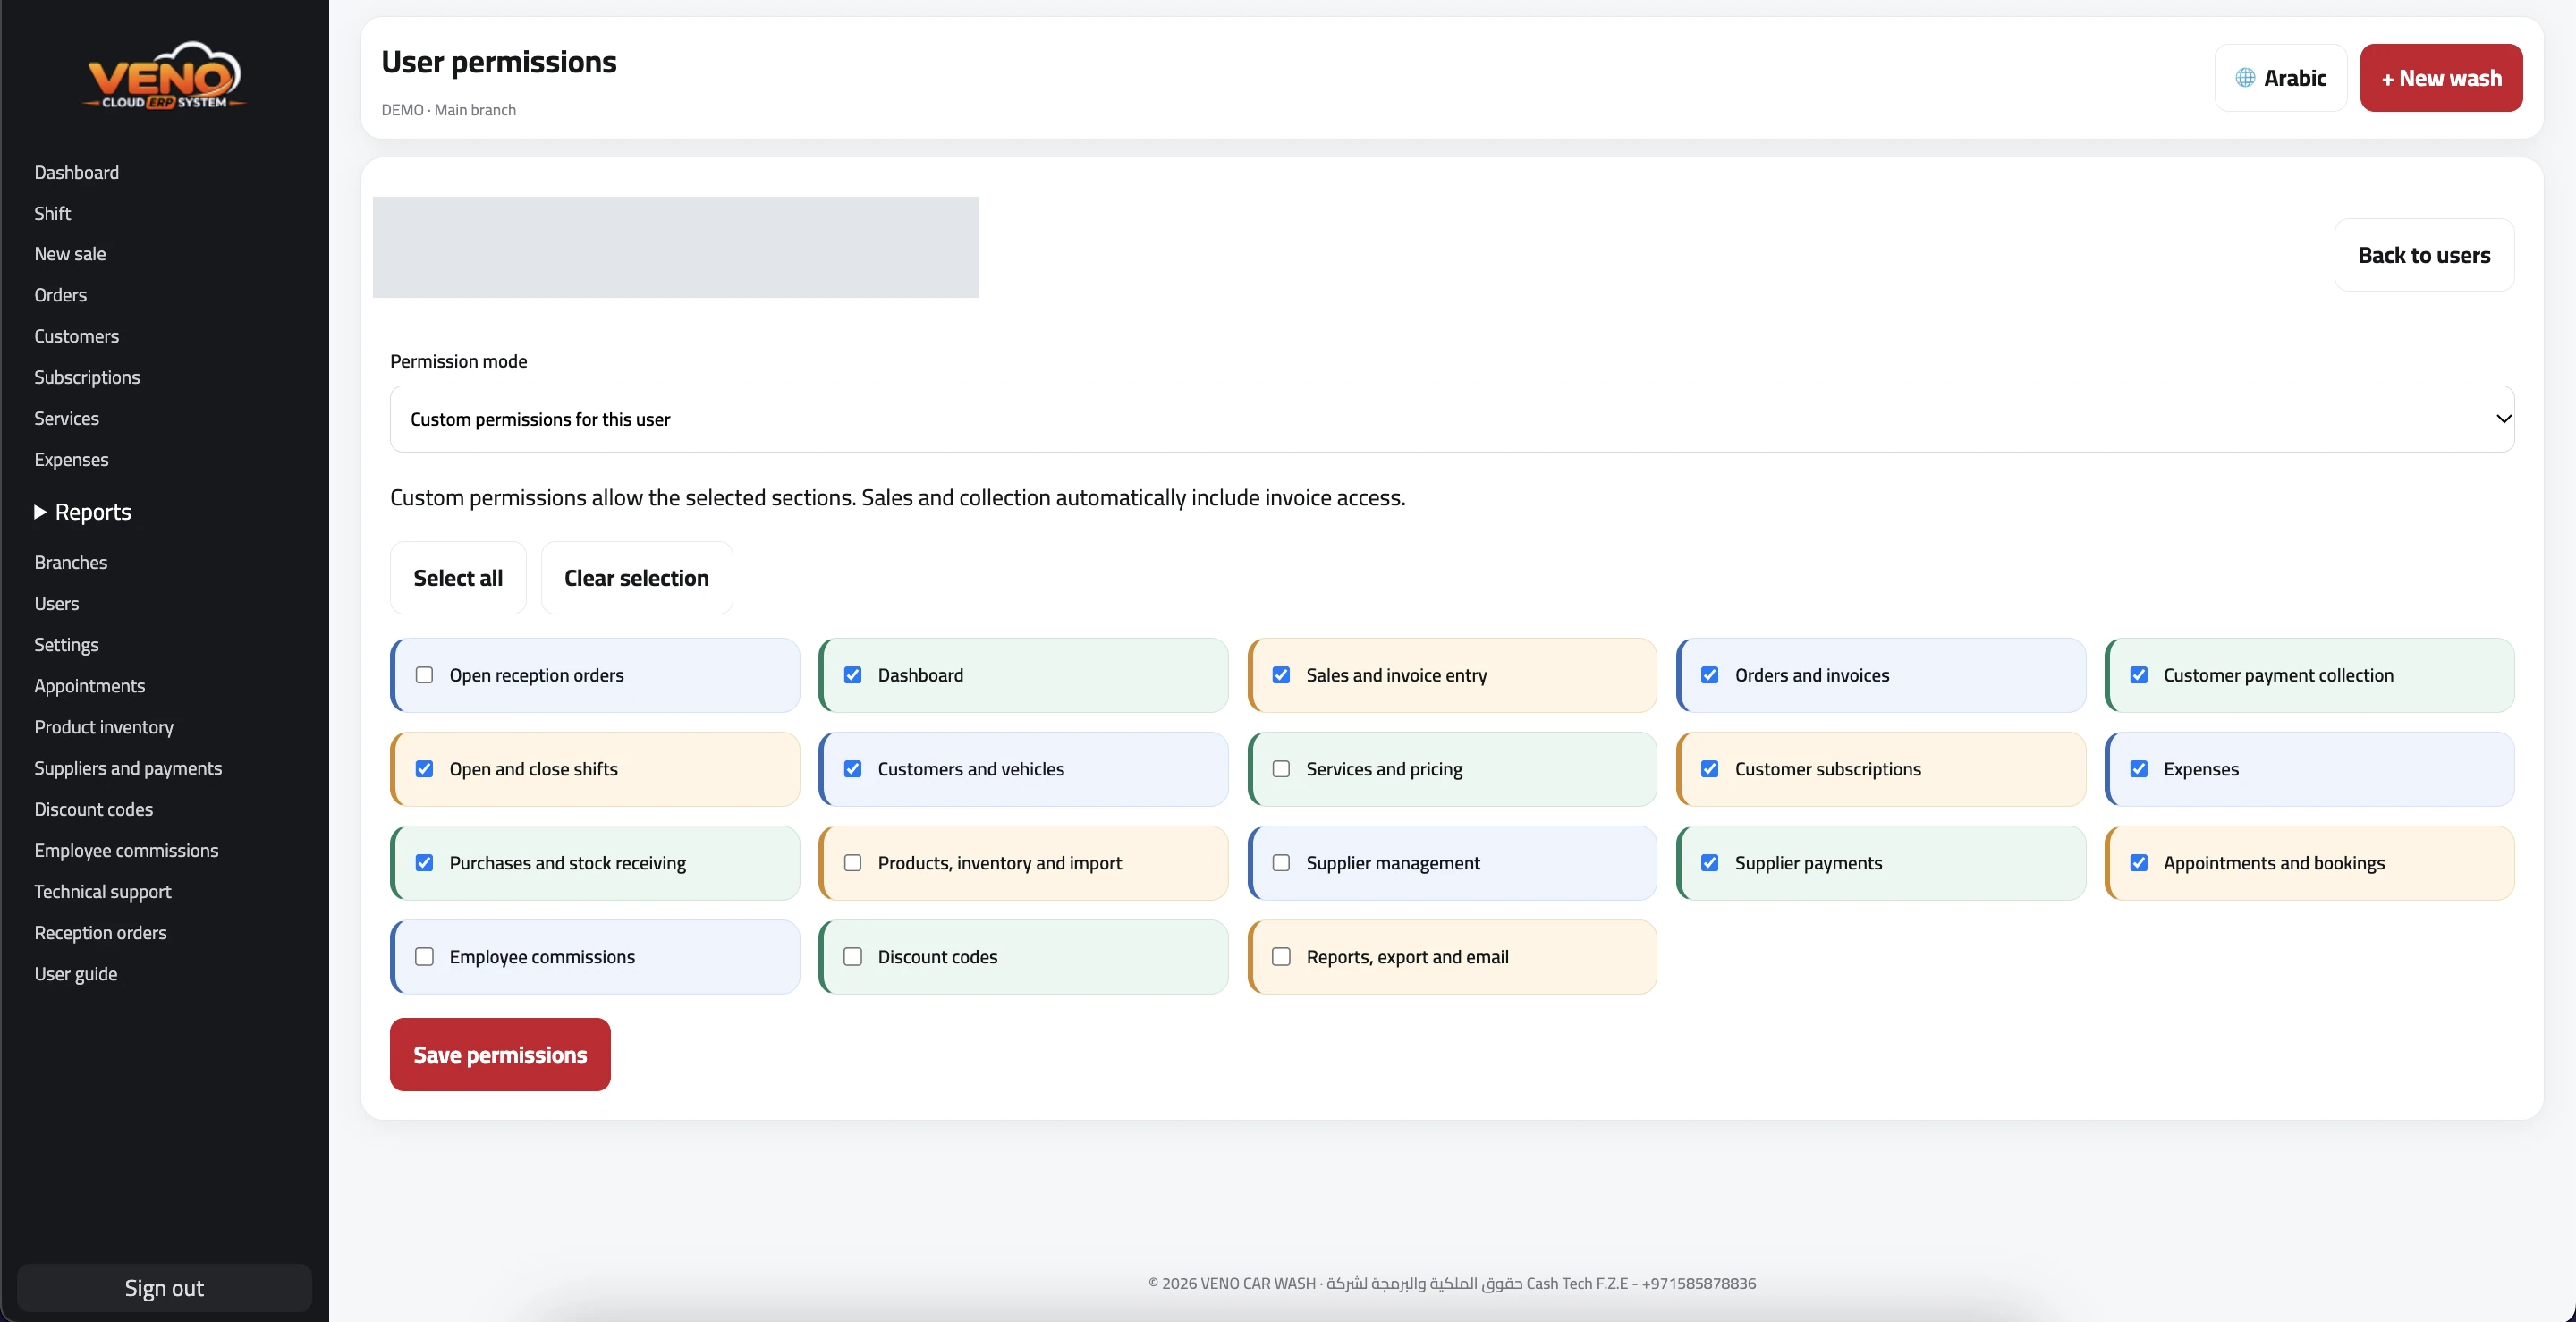 Employee permissions · Select the image to enlarge
- In Users, select Permissions next to the employee.
- Enable the modules required for their job, then save.
- Review sales, orders, and payment collection separately.
Tip: Check the resulting menu from the employee account.
14
Sign-in methods and PINs
The owner manages branch sign-in and employee PINs.
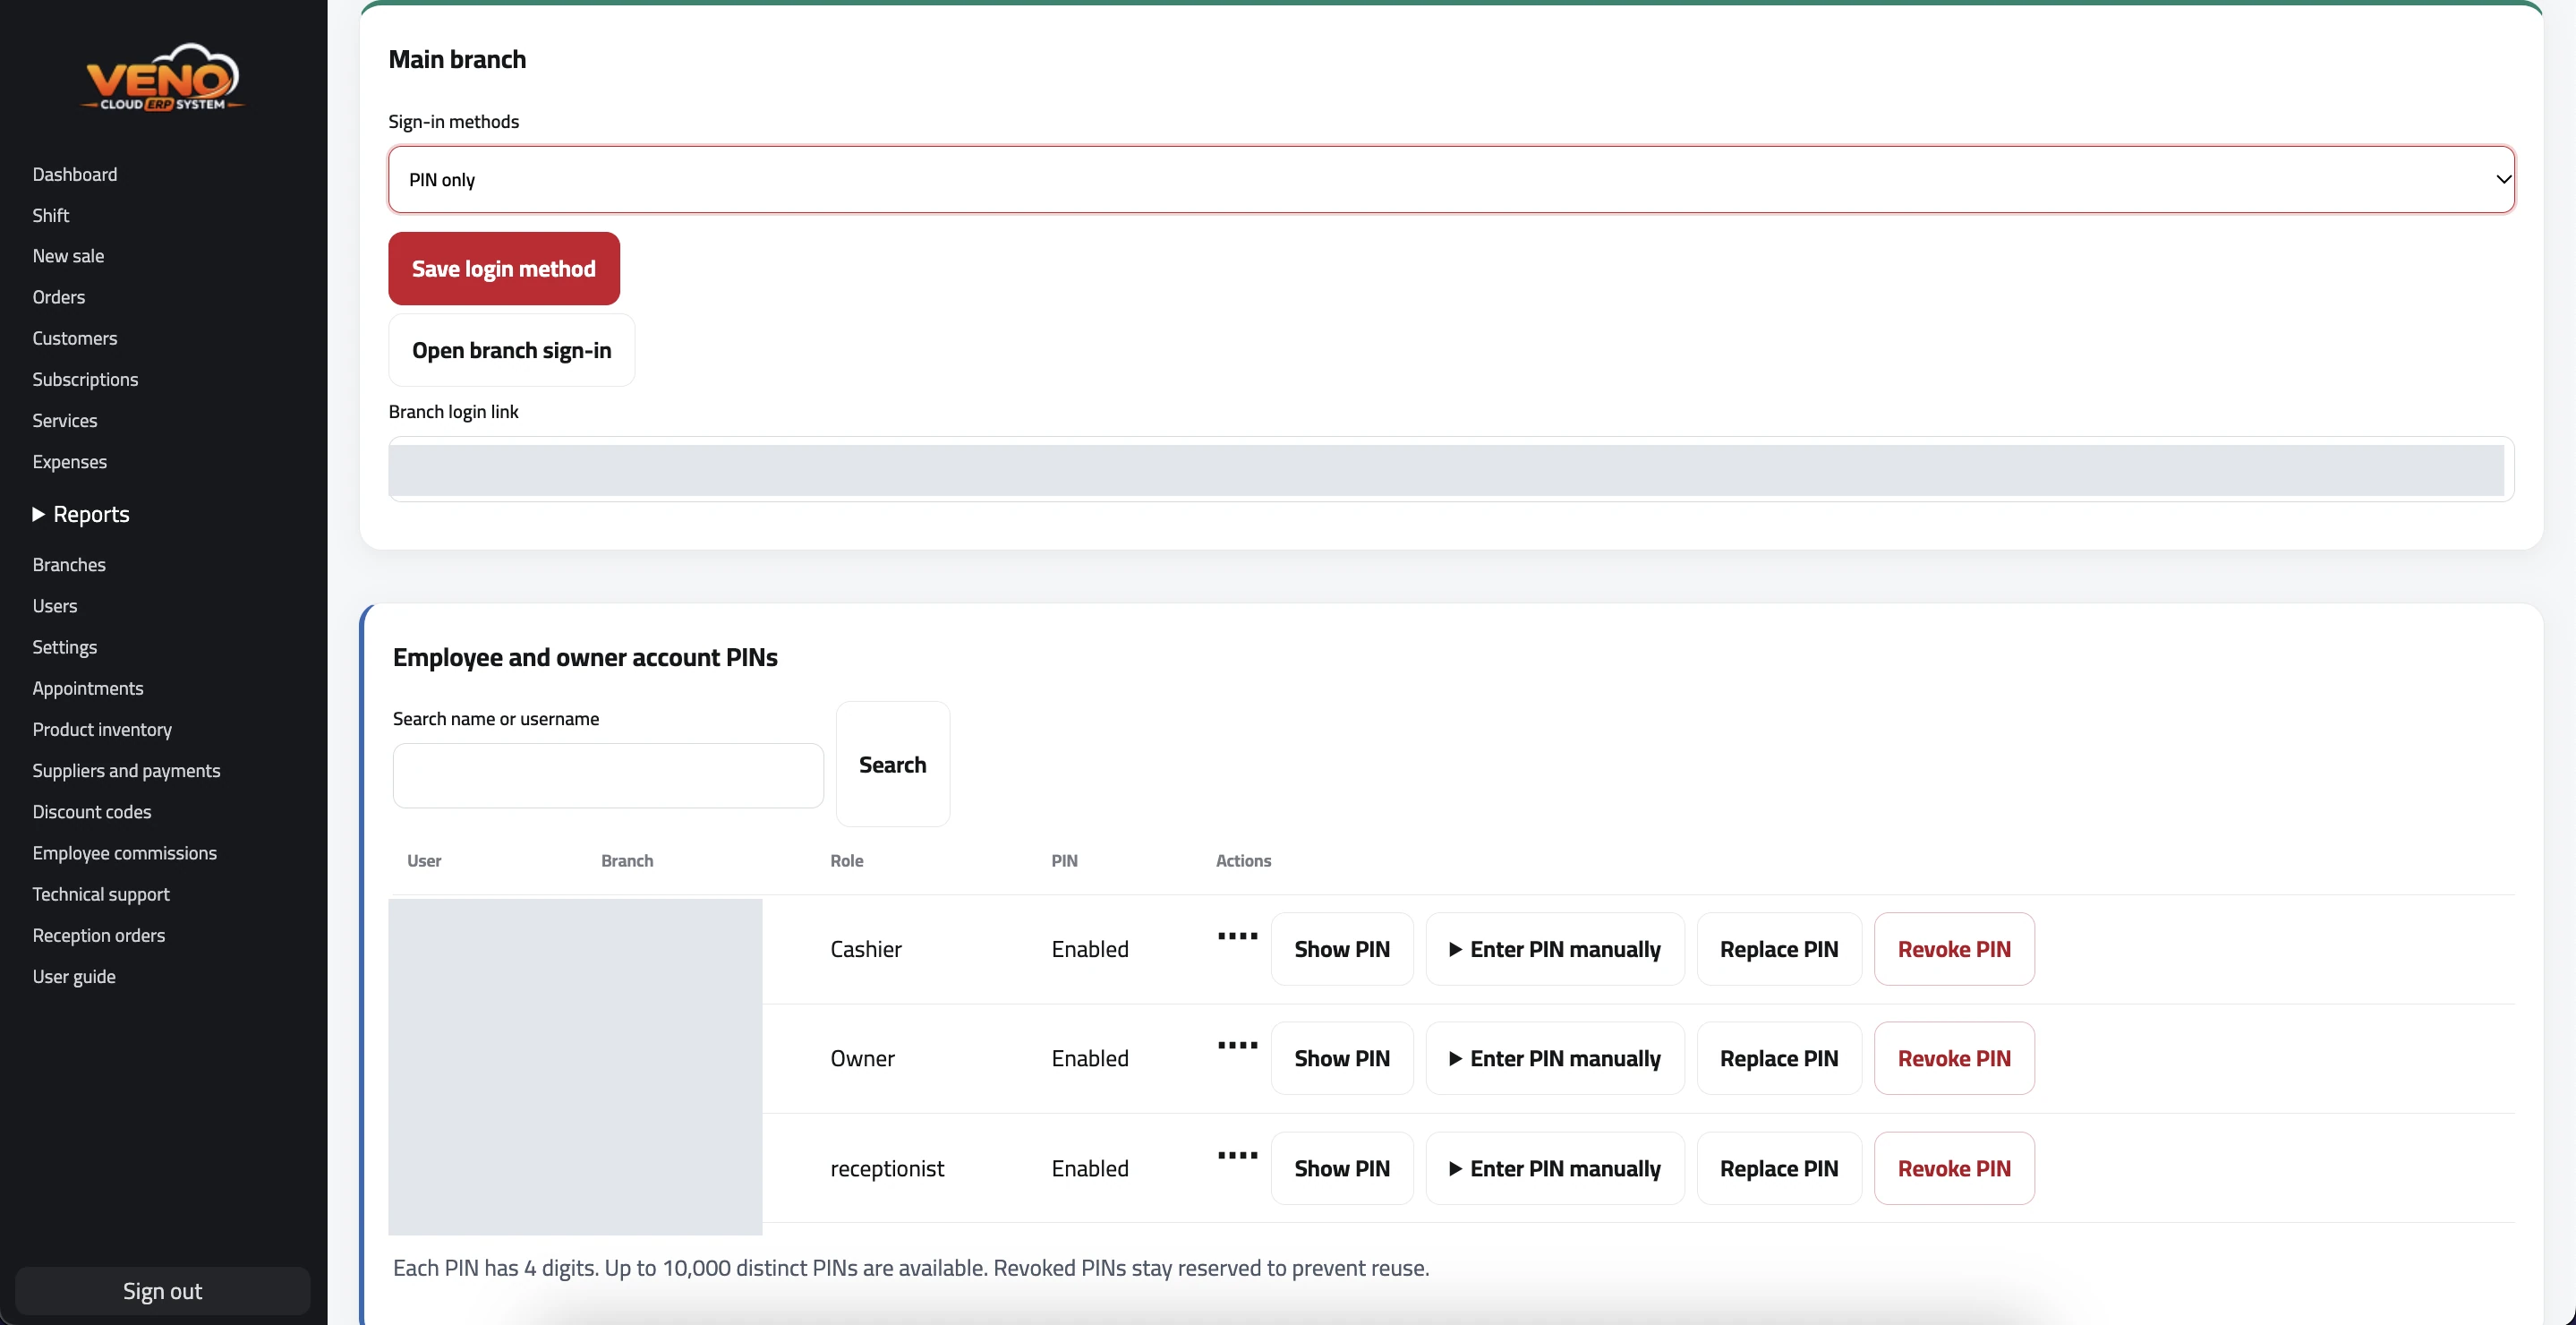 Sign-in methods and PINs · Select the image to enlarge
- Choose PIN, username and password, or both, then save.
- Assign, replace, or revoke a four-digit PIN from the employee list.
- For a cashier editing or deleting an existing invoice, the manager enters the approval PIN in that action.
Tip: Use the branch sign-in link when PIN login is enabled.
15
Appointments and bookings
Review branch bookings in the calendar.
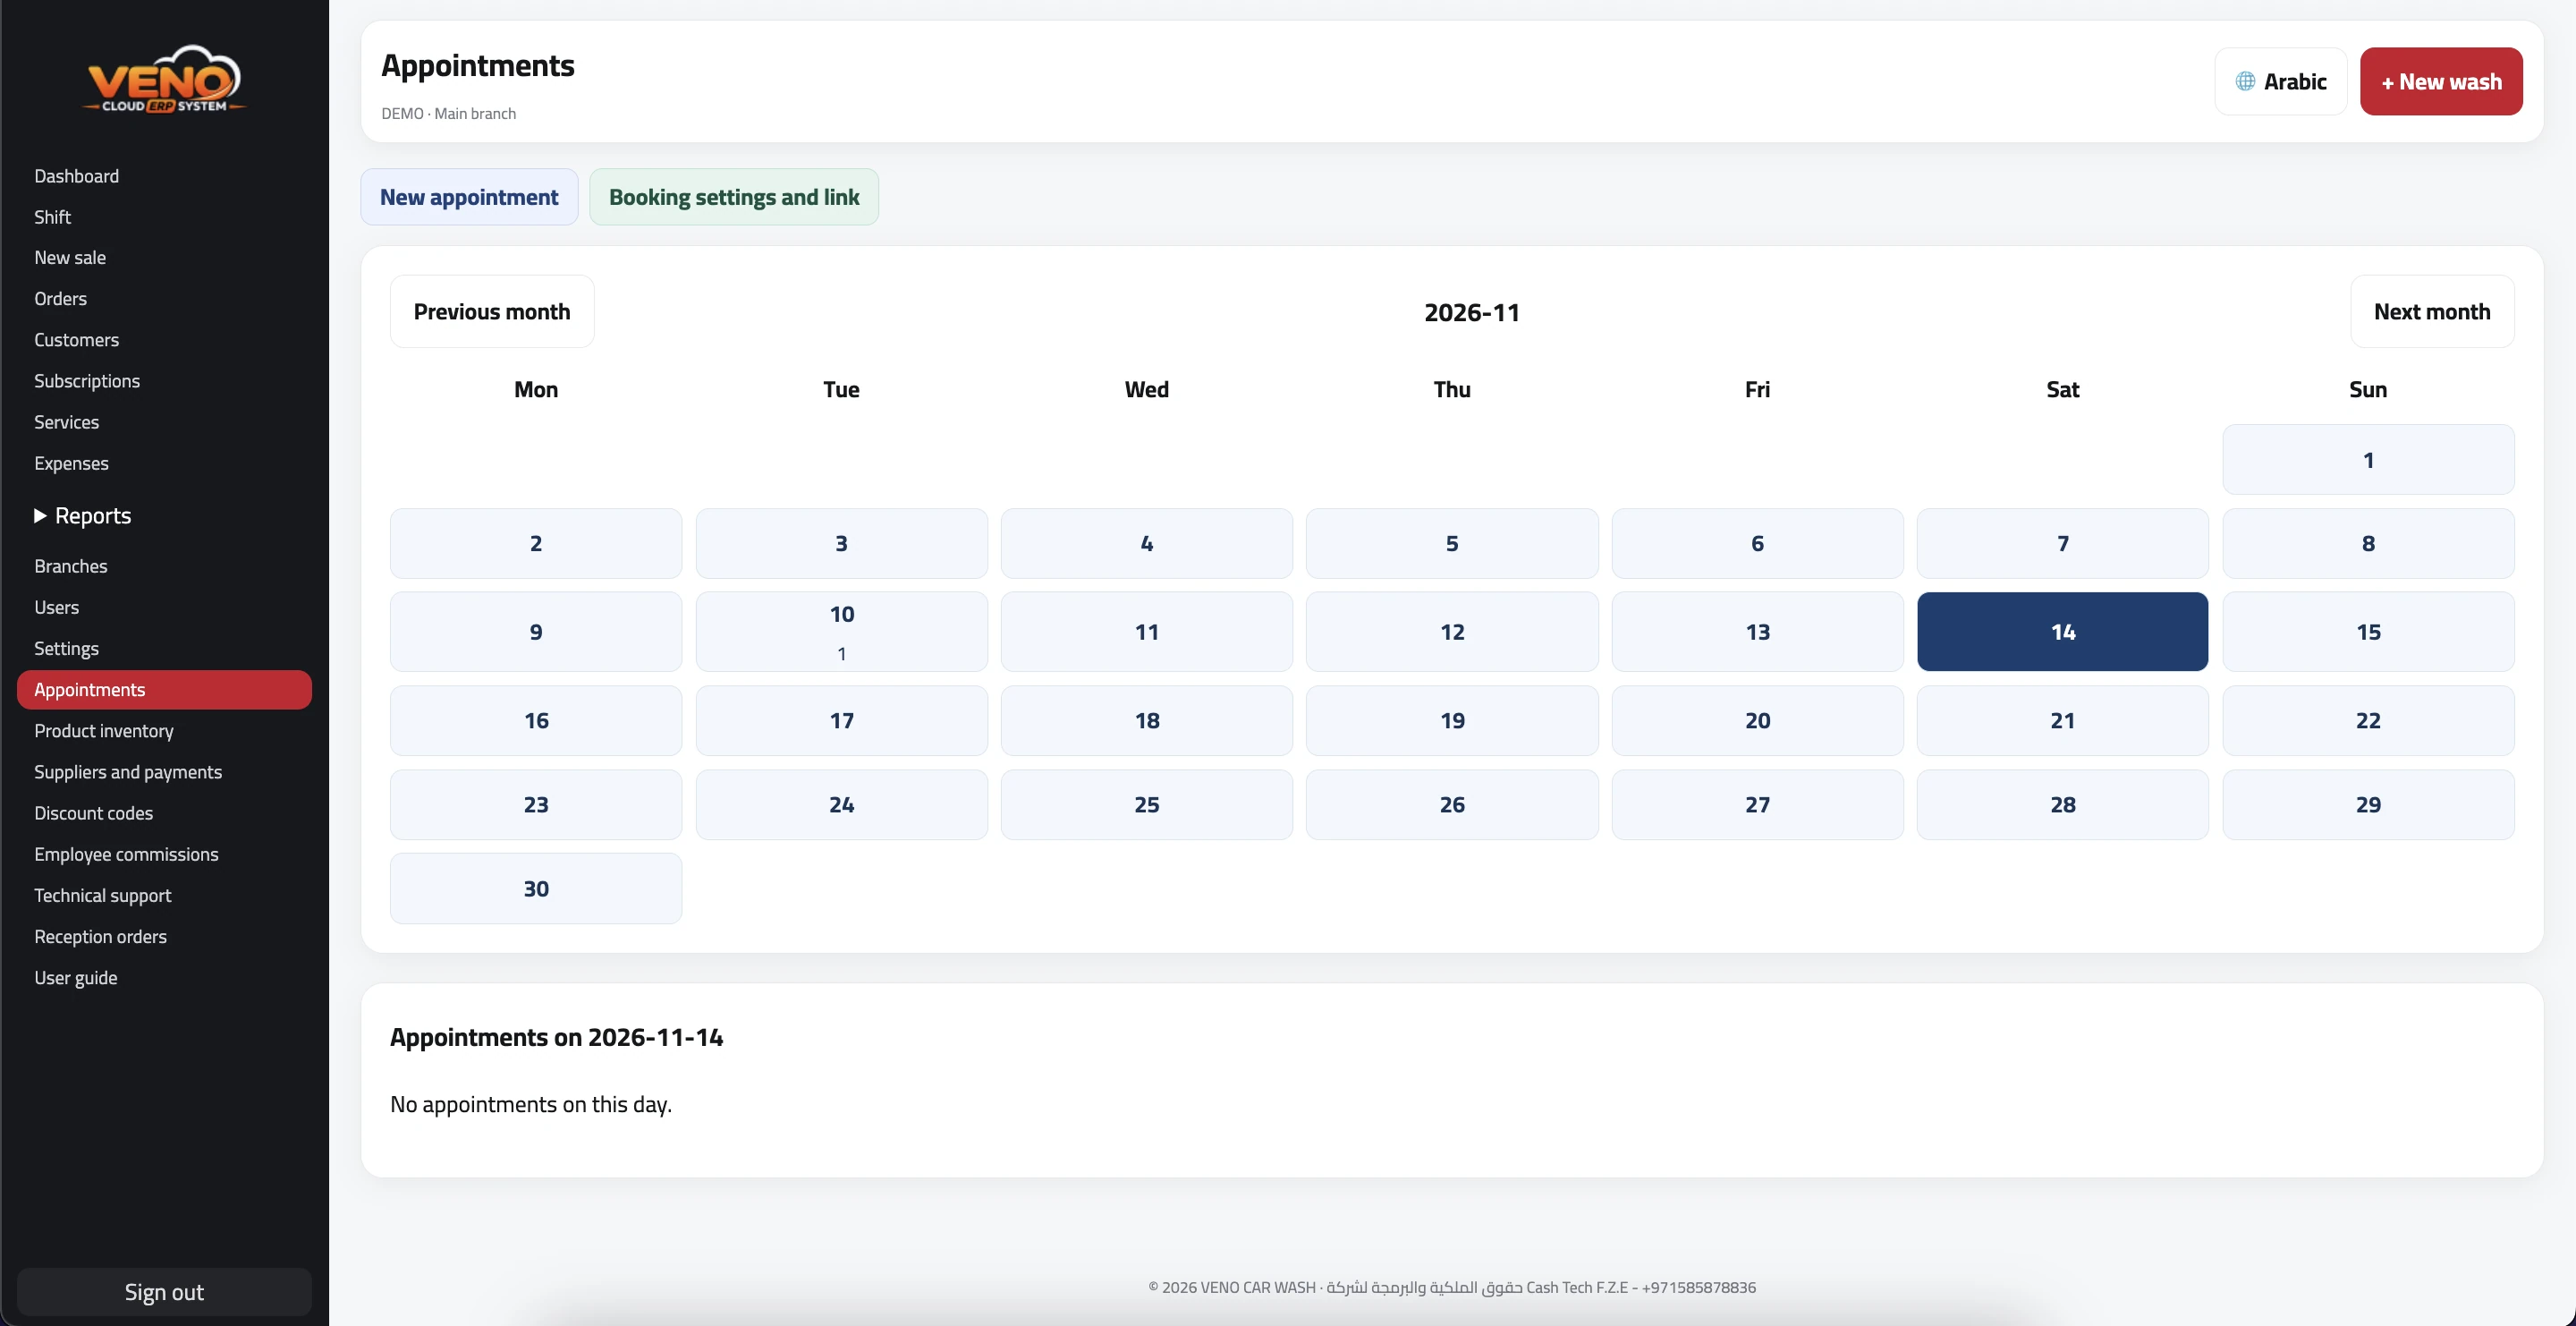 Appointments and bookings · Select the image to enlarge
- Select a date to see its appointments.
- Select New Appointment and enter the customer, vehicle, service, and time.
- Use Booking Settings and Link to review branch availability.
Tip: Open the calendar booking when the customer arrives.
16
Product inventory
Add products and review quantities and stock movements.
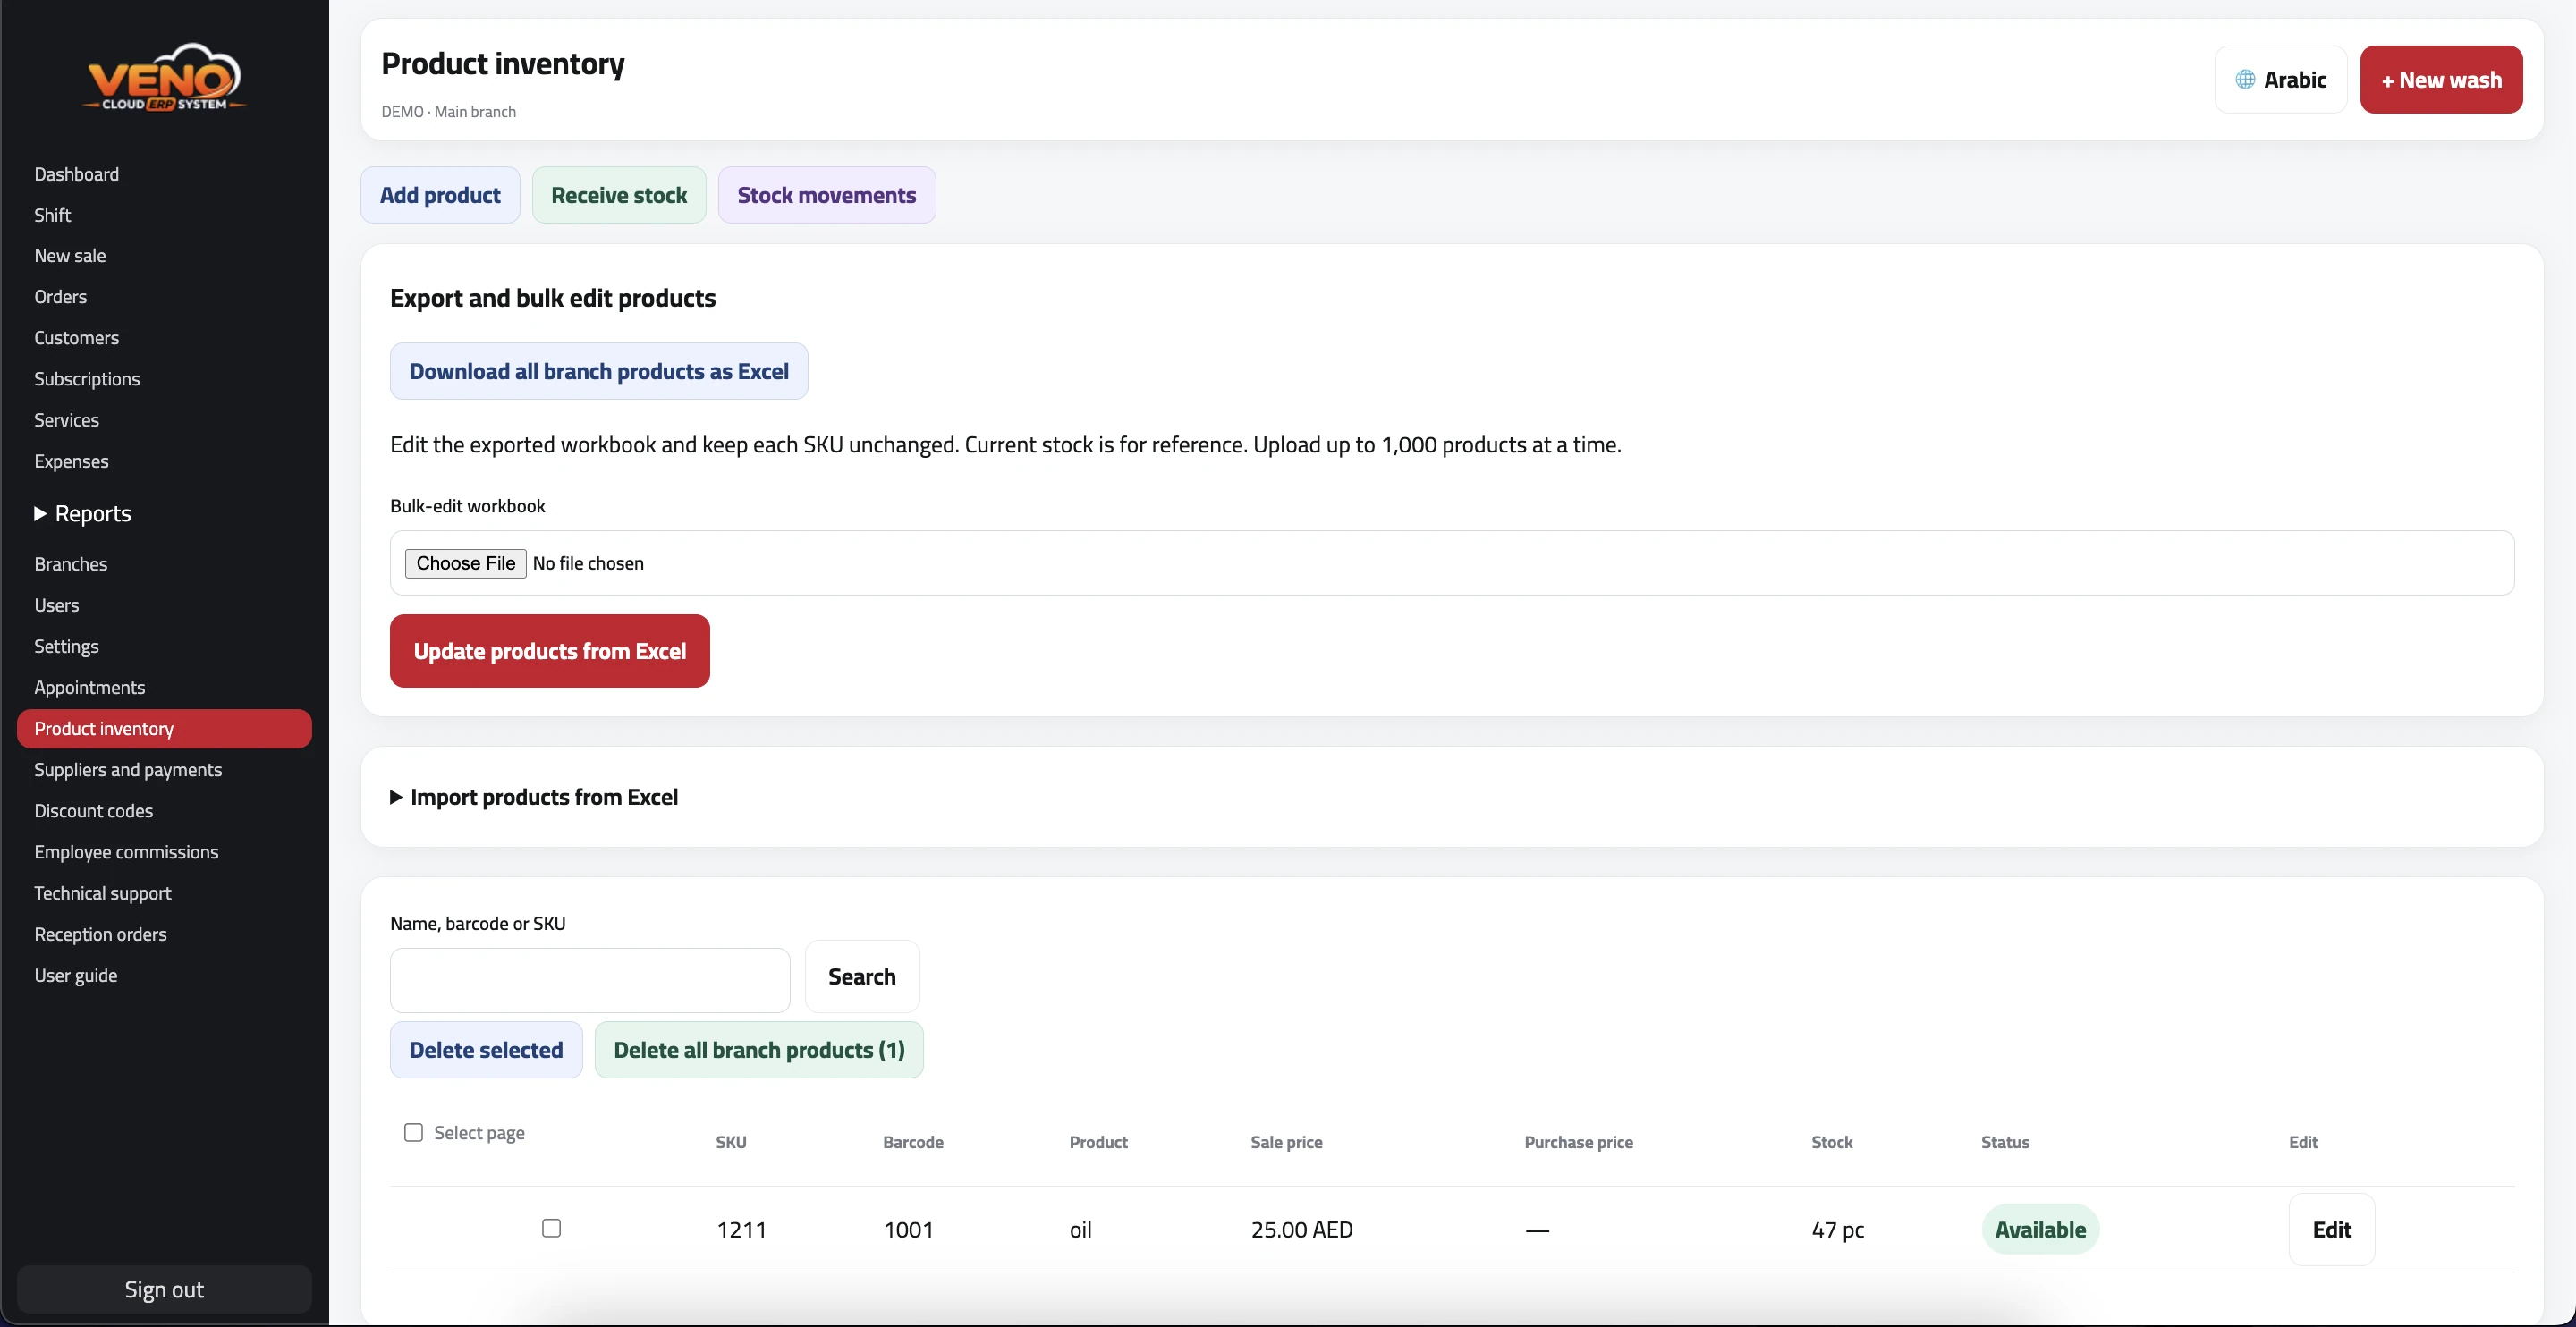 Product inventory · Select the image to enlarge
- Enter the name, barcode, unit, purchase price, sale price, and opening quantity when creating an item.
- Use Receive Stock to add quantities and Stock Movements to review the log.
- For bulk creation, download the Excel template, fill it in, and import it.
- For bulk editing, export the items, edit the workbook, and upload it again. Keep item codes unchanged.
Tip: Search by name or barcode before editing an item.
17
Suppliers and payments
Track supplier balances and payments.
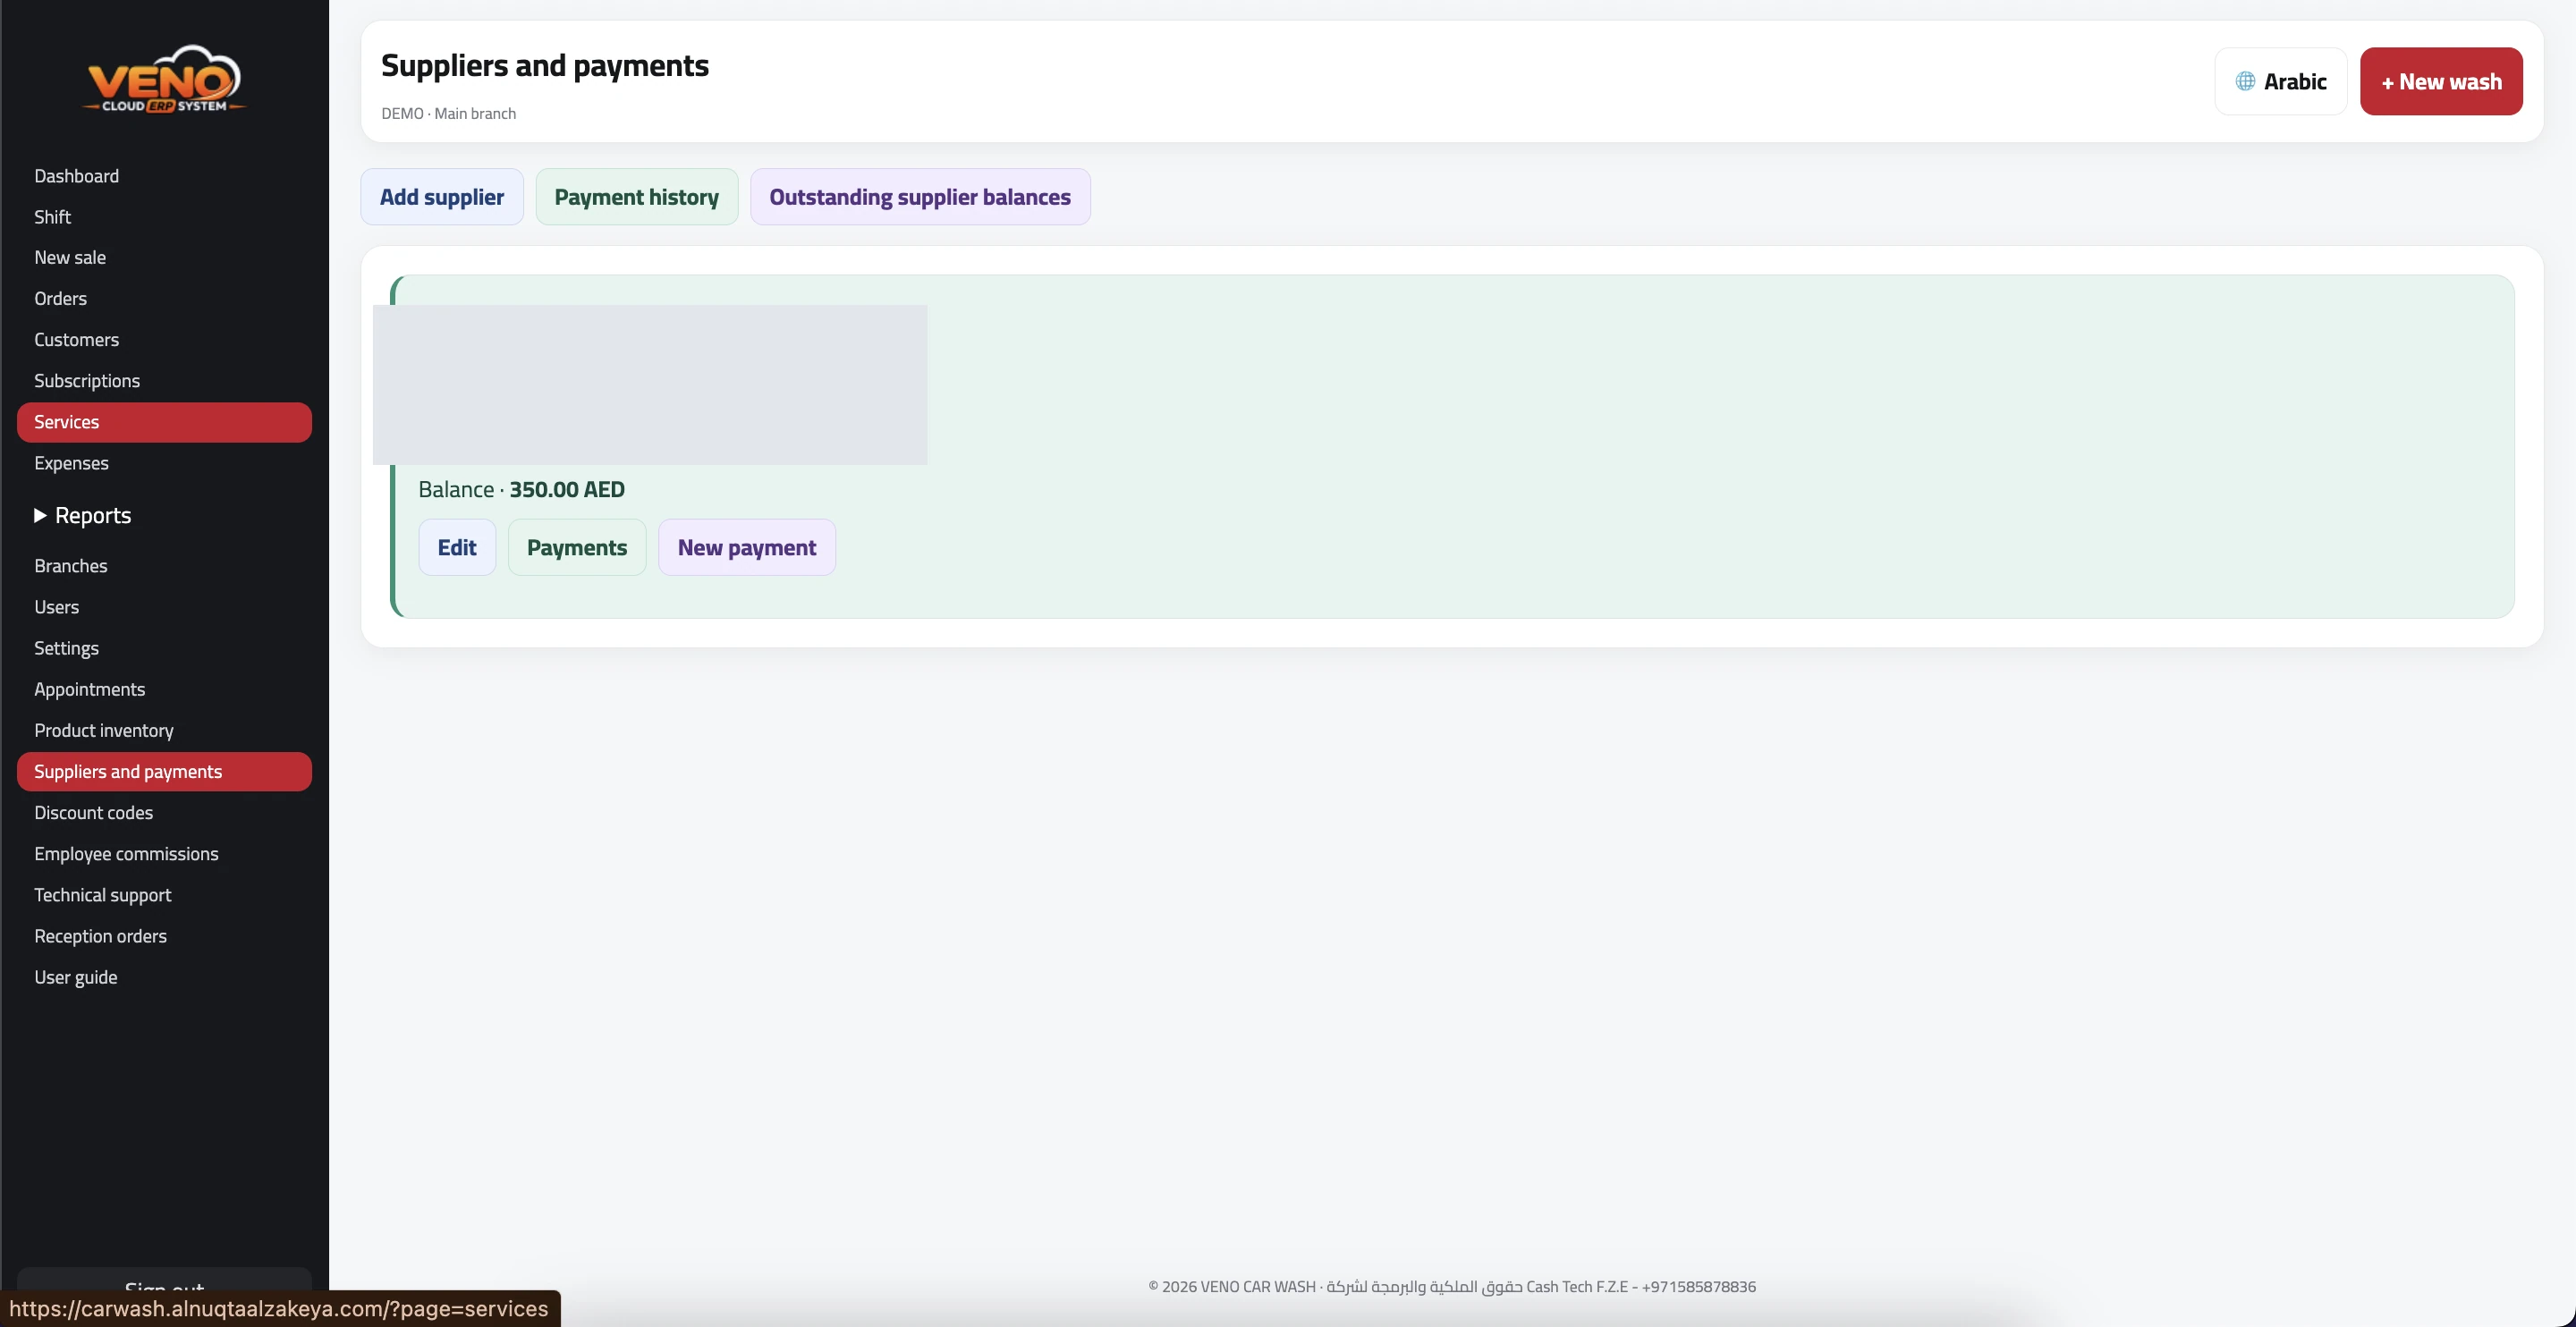 Suppliers and payments · Select the image to enlarge
- Select Add Supplier and enter supplier details.
- Open the supplier card and review the outstanding balance.
- Select New Payment and enter the amount, method, and optional reference.
- Use Payment History or Outstanding Supplier Balances to reconcile.
Tip: Review supplier payments in the shift report.
18
Discount codes and wash offers
Set a branch discount or a wash reward for registered customers.
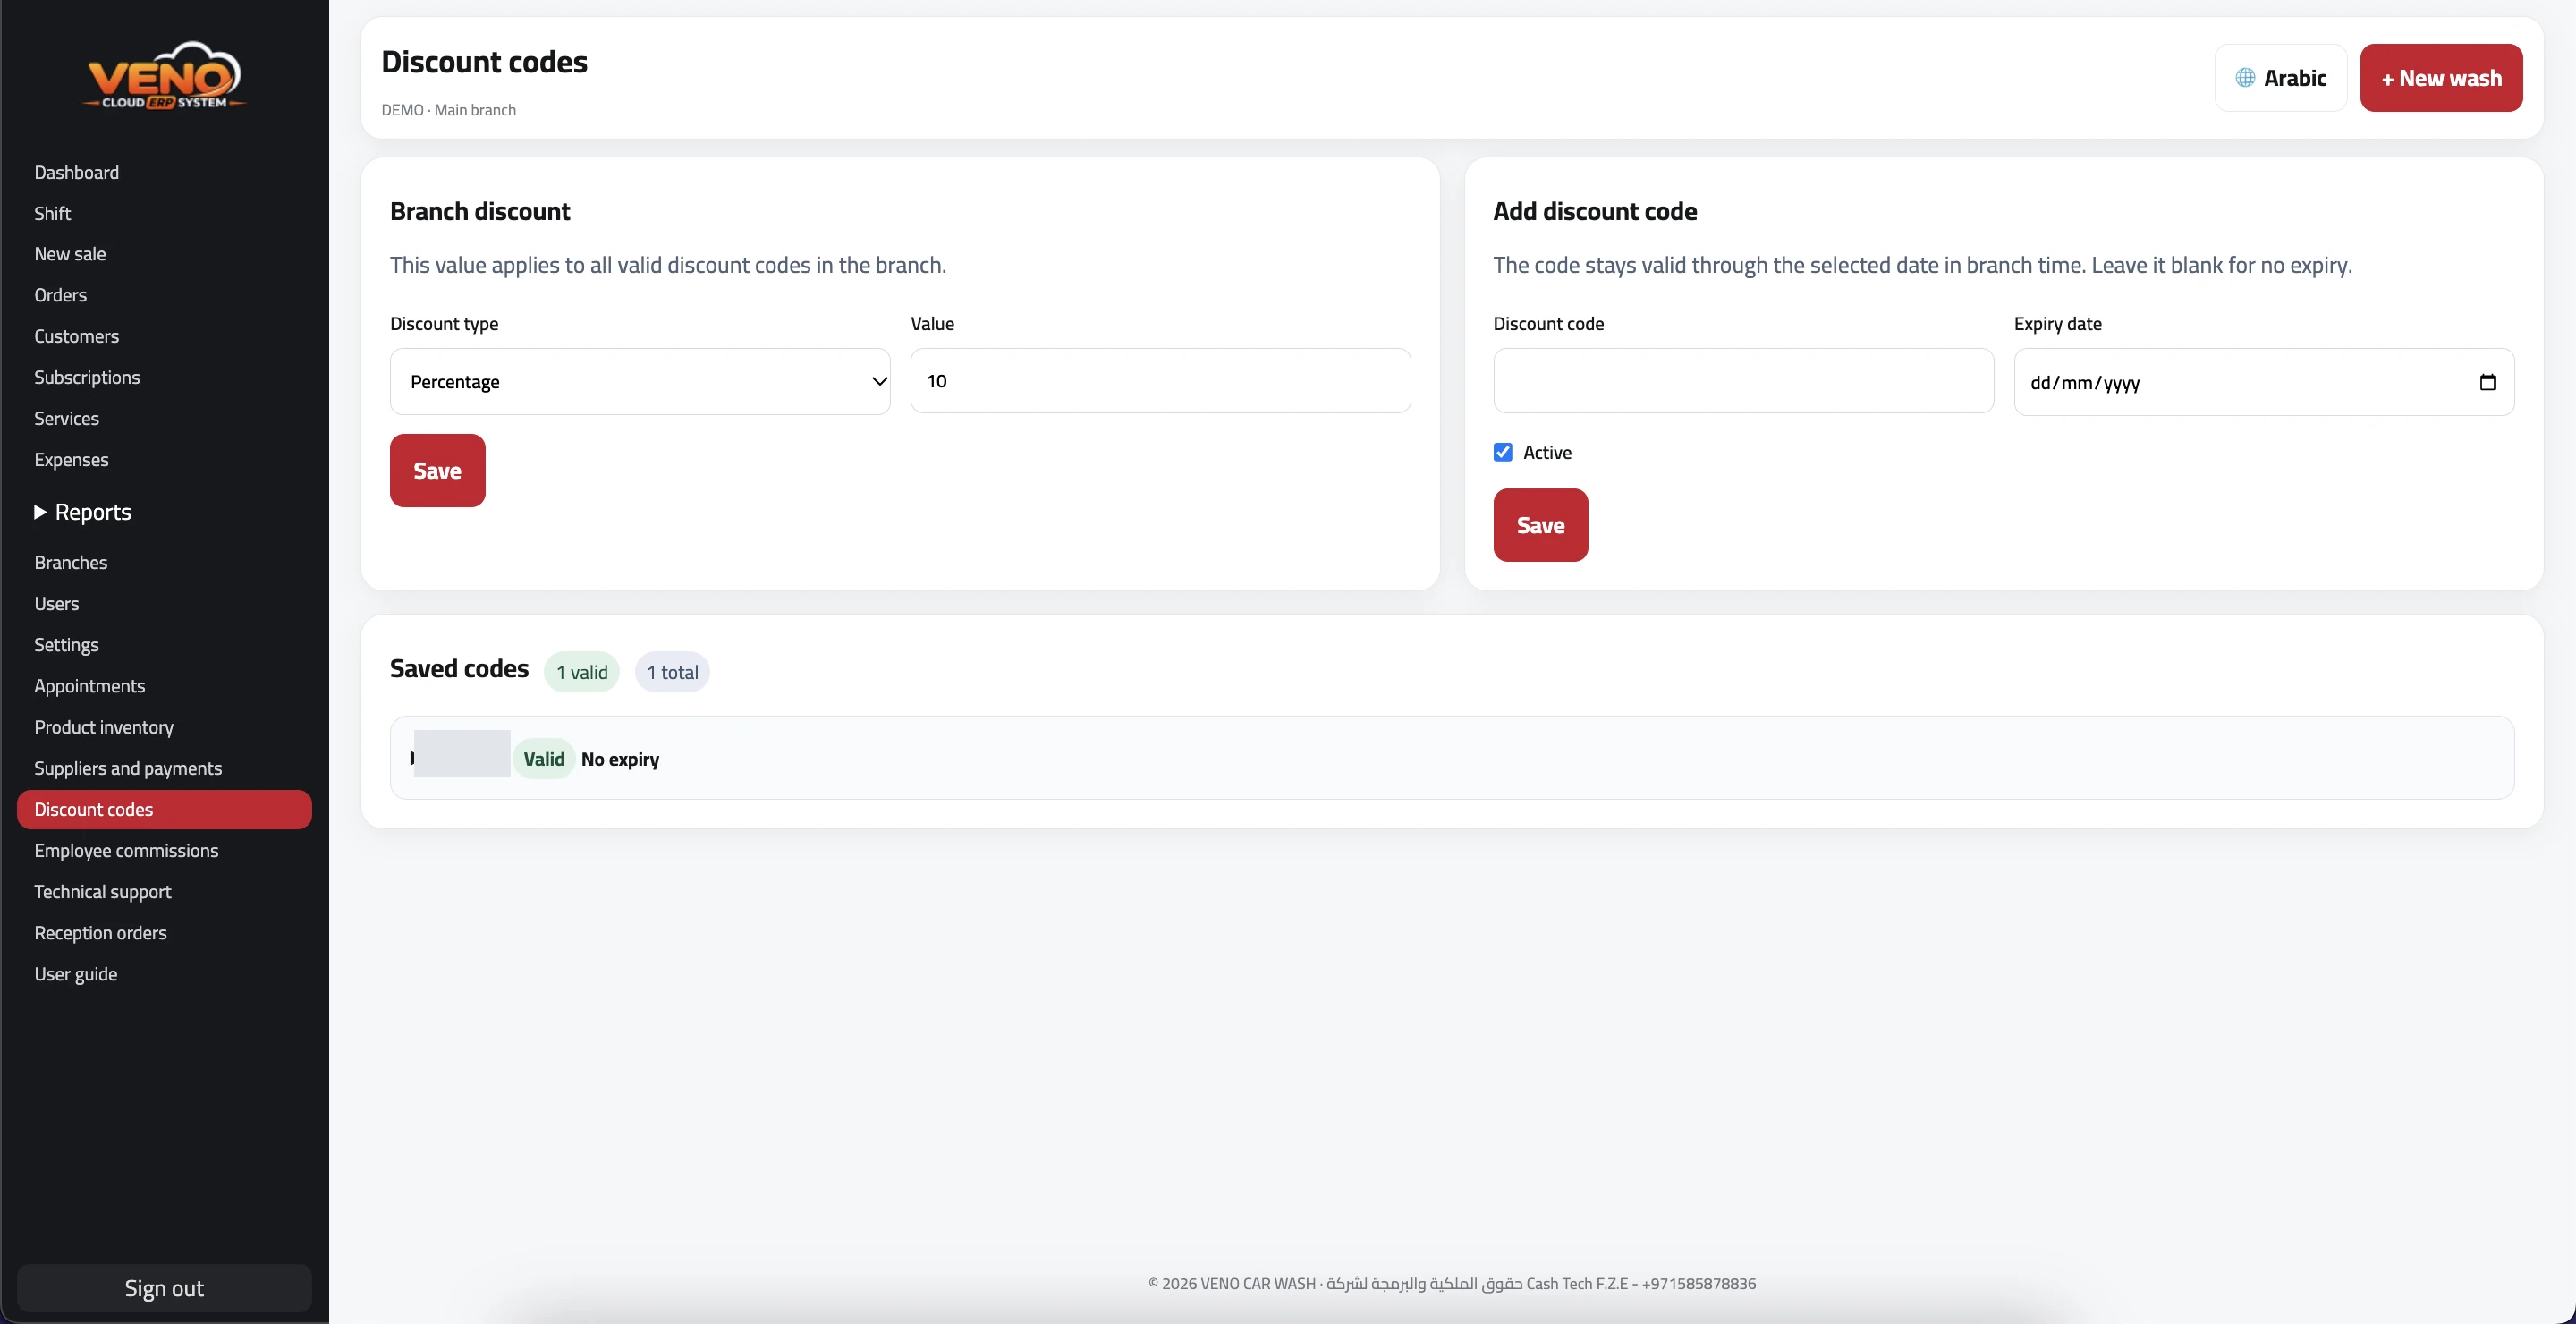 Discount codes and wash offers · Select the image to enlarge
- Set the branch code discount type and value, then save.
- Add the code, expiry date, and activation status.
- Enter the code on the sales screen. The system validates it on save.
- Under Services → Wash Offers, choose the service, paid and free wash counts, and expiry date.
Tip: Check the offer conditions and selected customer before saving.
19
Employee commissions
Assign an employee to a service and set the commission rate.
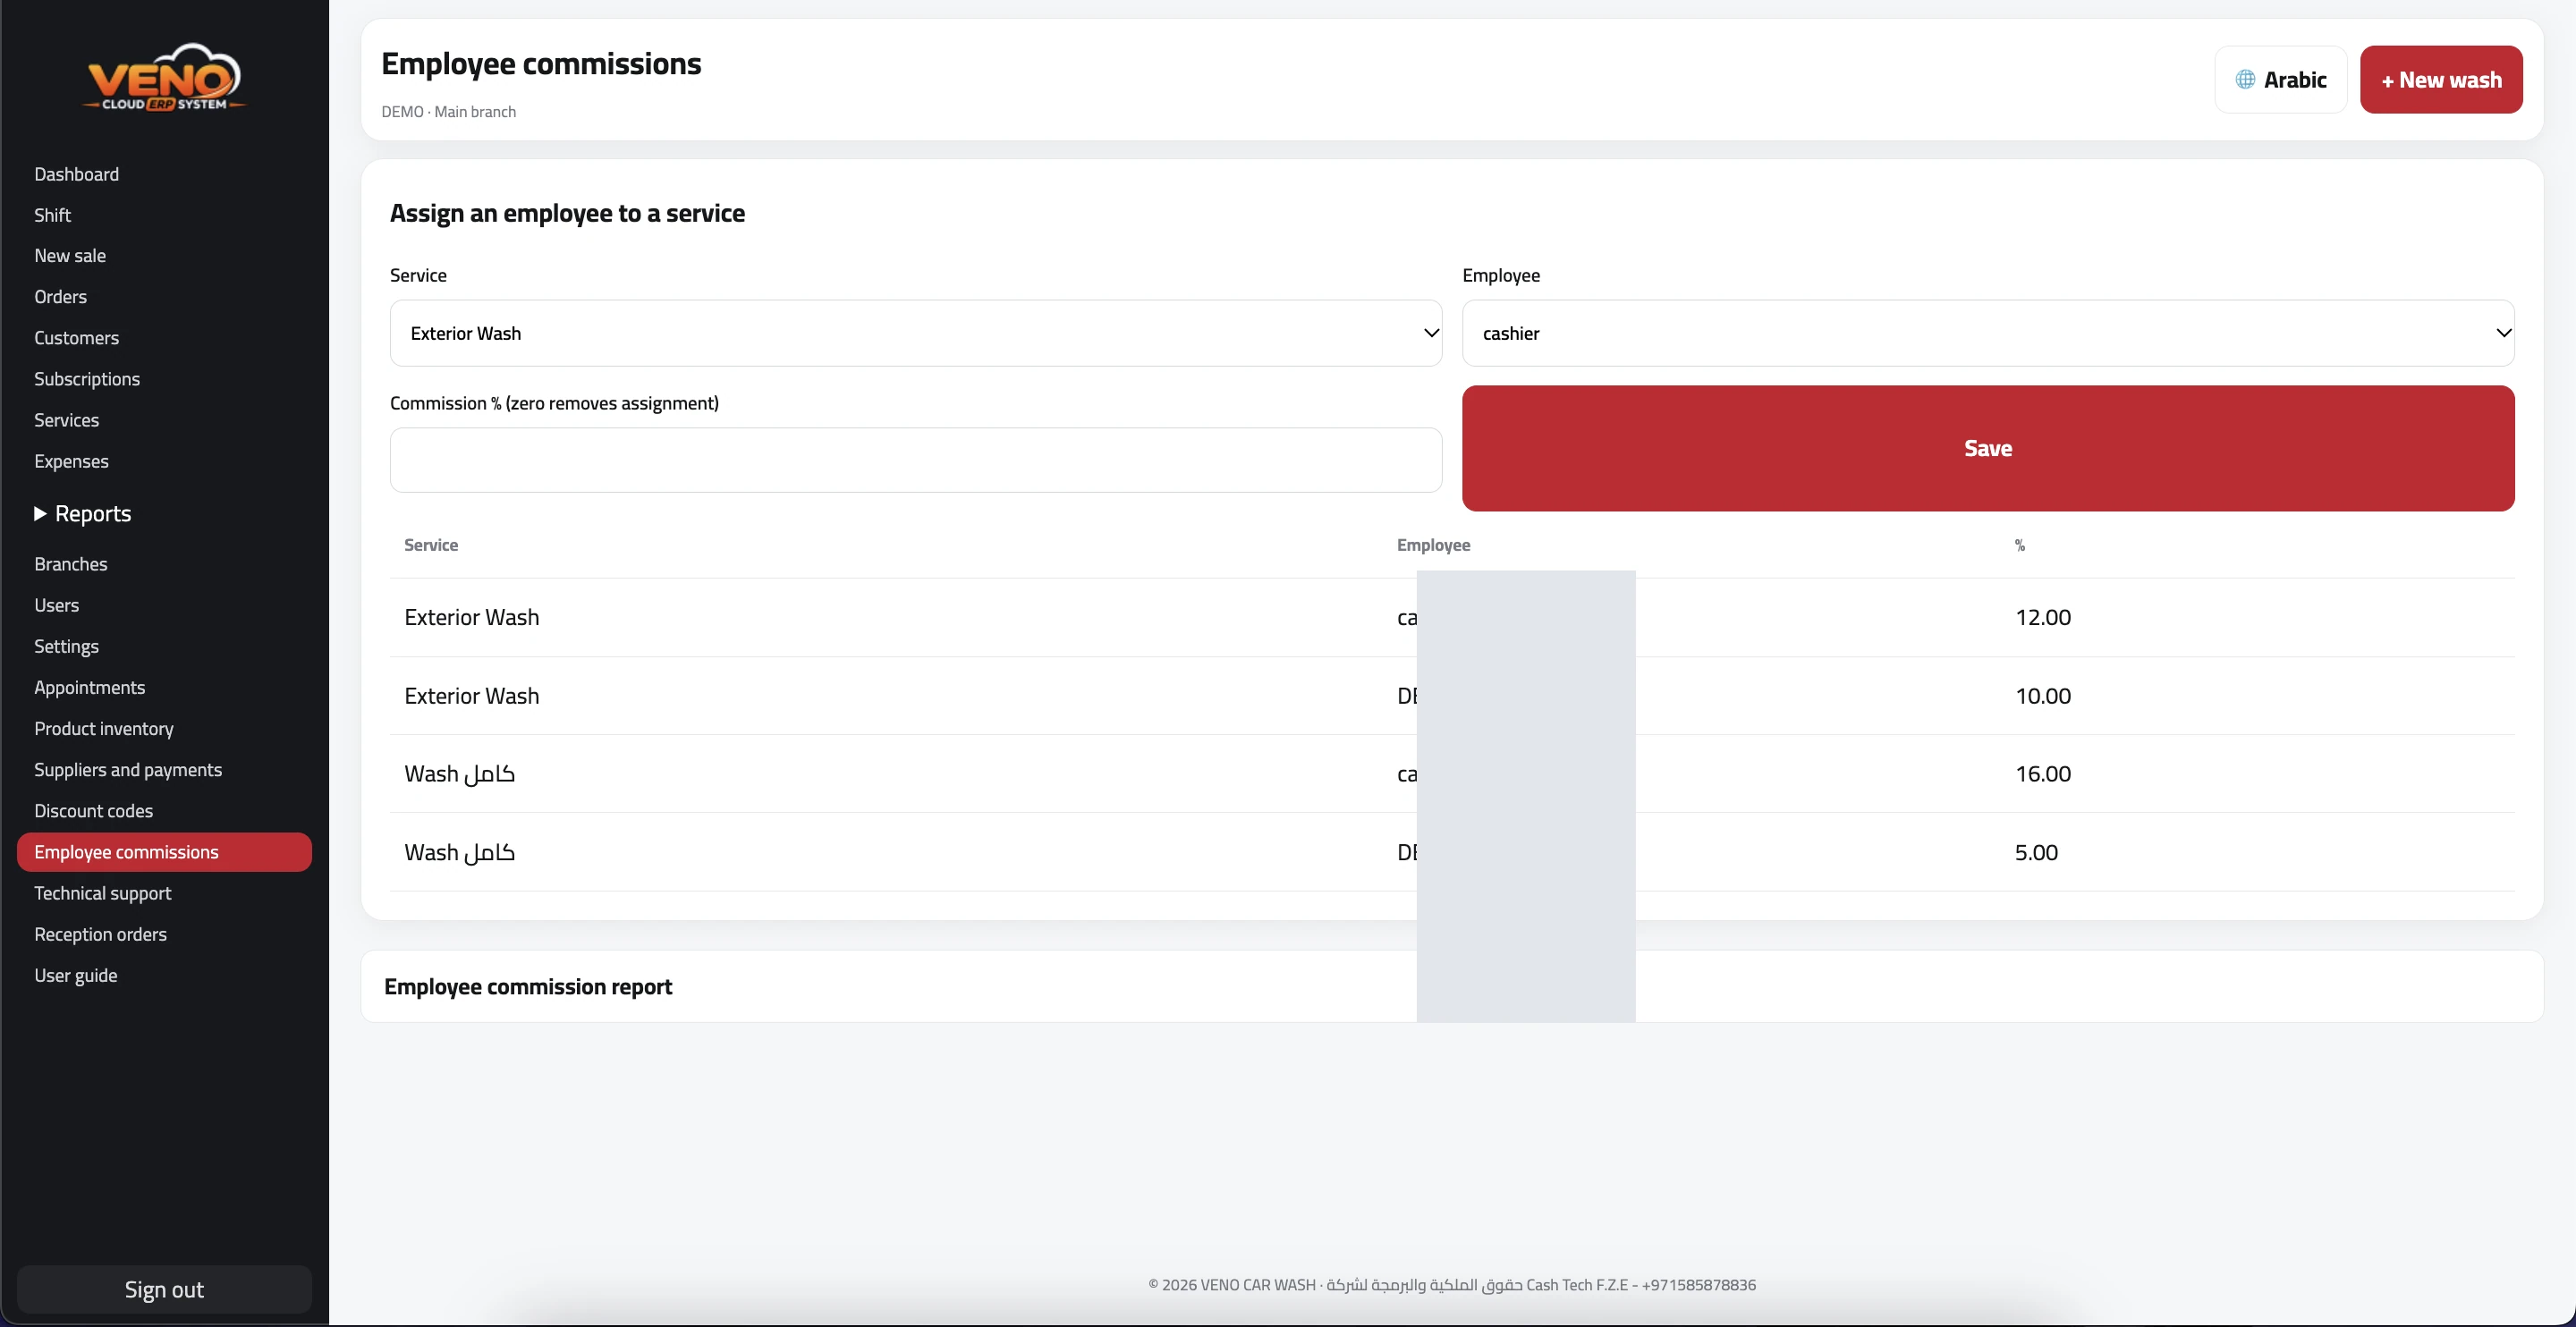 Employee commissions · Select the image to enlarge
- Choose the service and employee, enter the percentage, and save.
- On the sales screen, select the employee who performed the service.
- Review the commission report for the relevant period.
Tip: Showing the assigned employee on invoices depends on branch settings.
20
Technical support
Send and follow support requests inside the system.
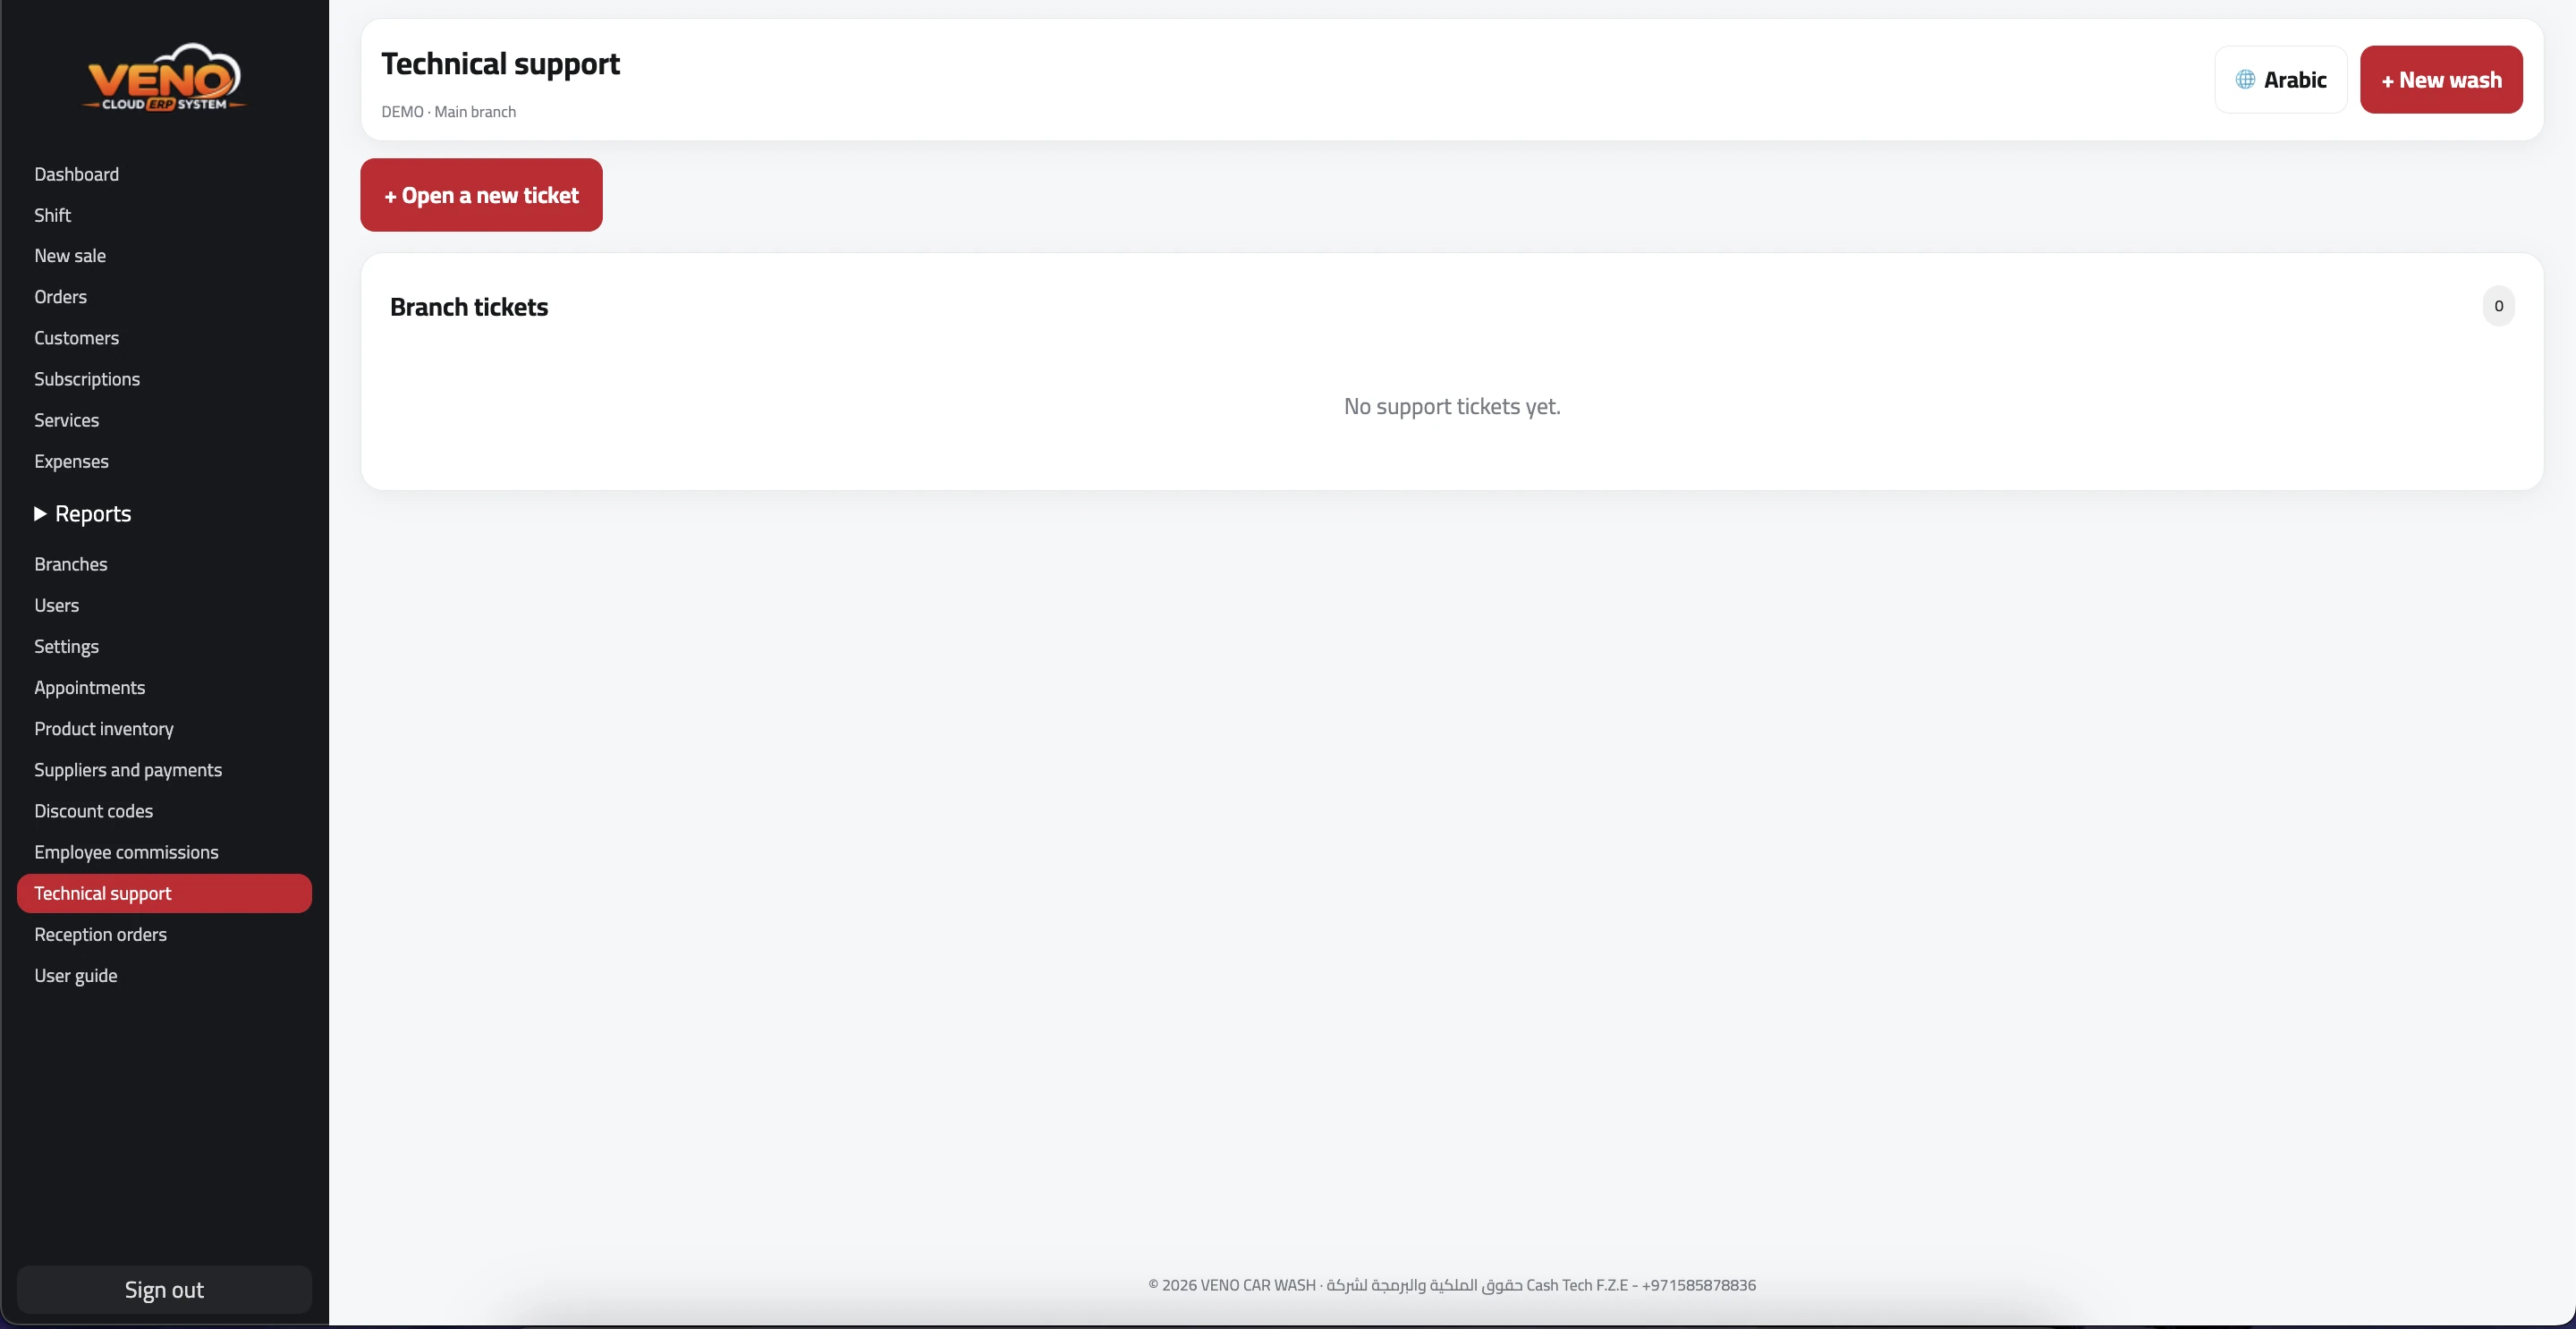 Technical support · Select the image to enlarge
- Create a ticket with title, department, priority, and description.
- Select the ticket number to view messages and reply.
- Track status and support responses on the same page.
- A permanently closed ticket cannot reopen; create a new one.
Tip: Include a clear description and affected invoice or branch.
CASH TECH F.Z.ENeed more help?
Create a ticket from Technical Support inside the system. Your request will go directly to the support team.
Open technical support